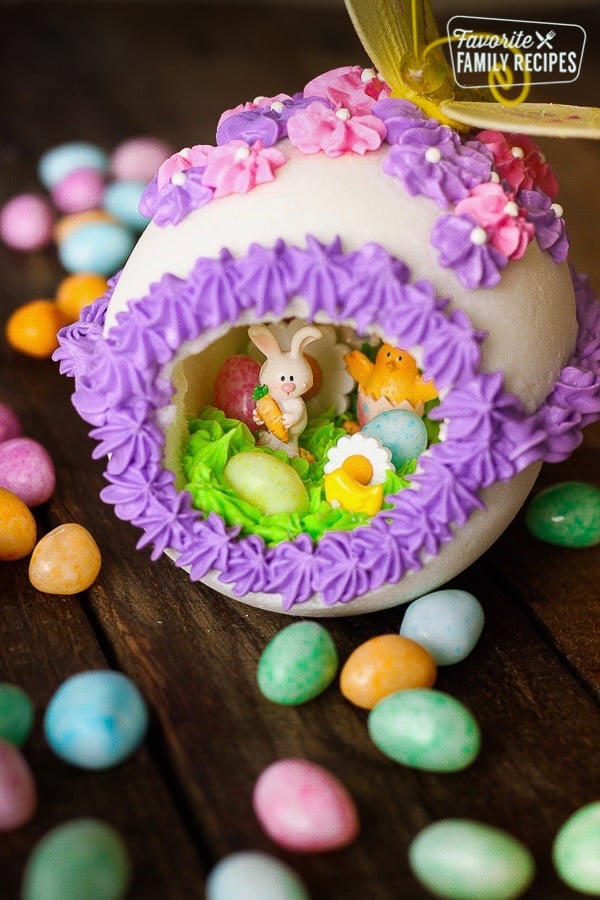
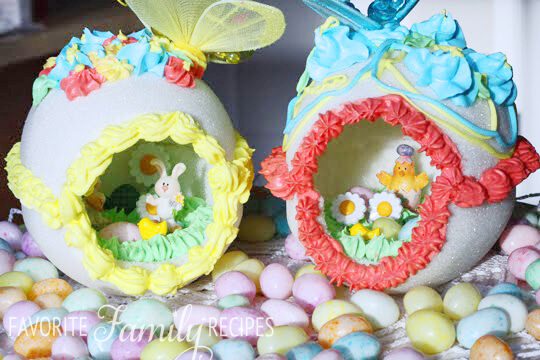
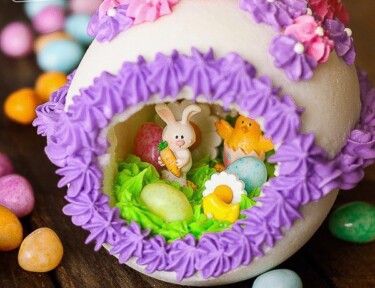
Panoramic Easter eggs are the perfect way to have a fun craft and special time with your loved ones! They are simple to make and come together quickly and easily when making them. These are a fun Easter tradition and a great memory for years to come!Though this isn’t a recipe that is edible, I still wanted to add it to the site because this truly is a family favorite. It does have ingredients and is a memorable craft for you and your family to make together or give to others. If you are looking for some edible Easter recipes, try one of these “Must Have” Easter Desserts and Treats!
What you need to make Panoramic Easter Eggs
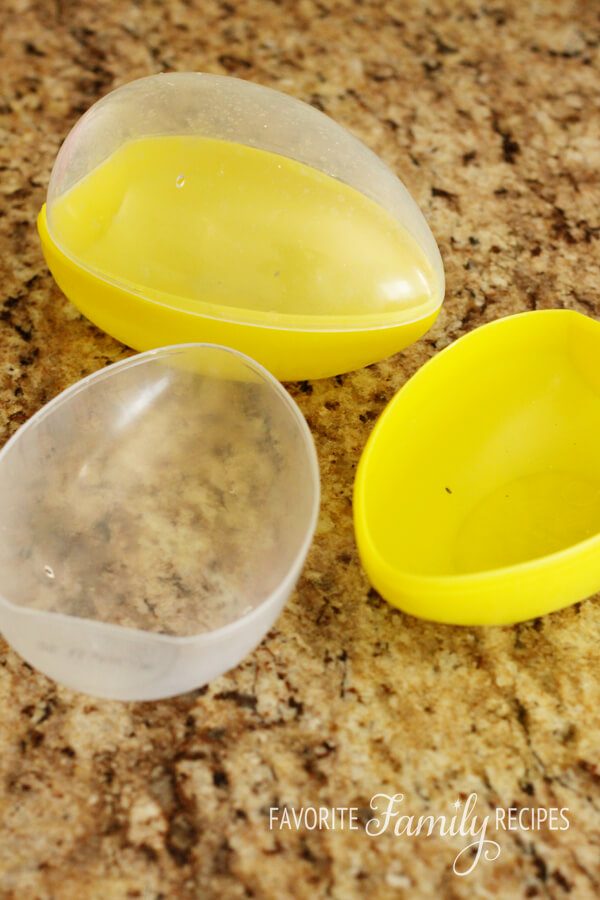
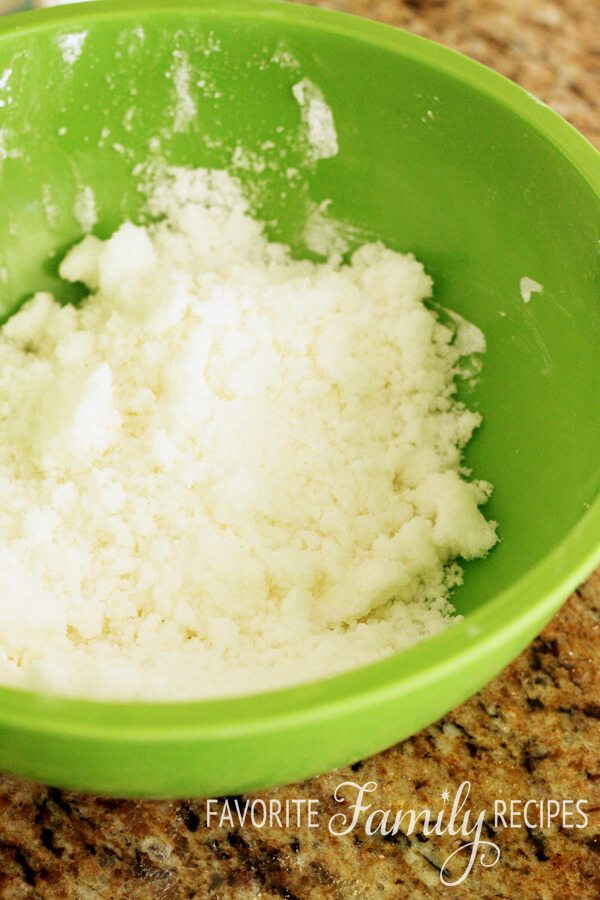
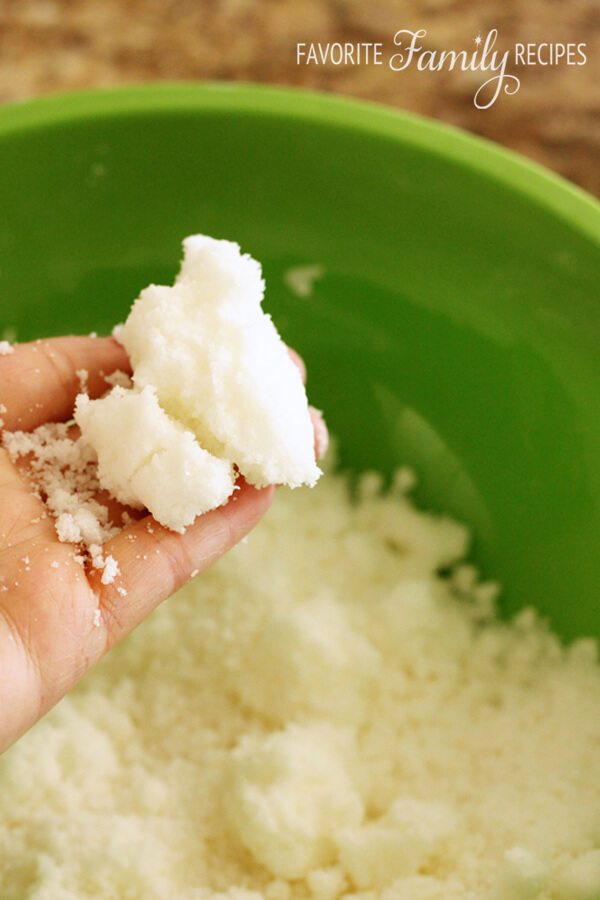
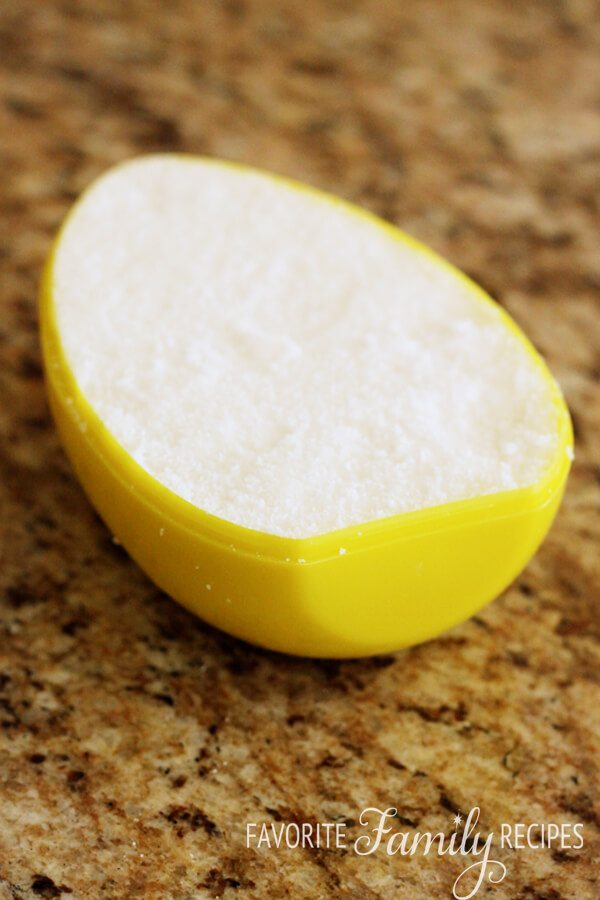
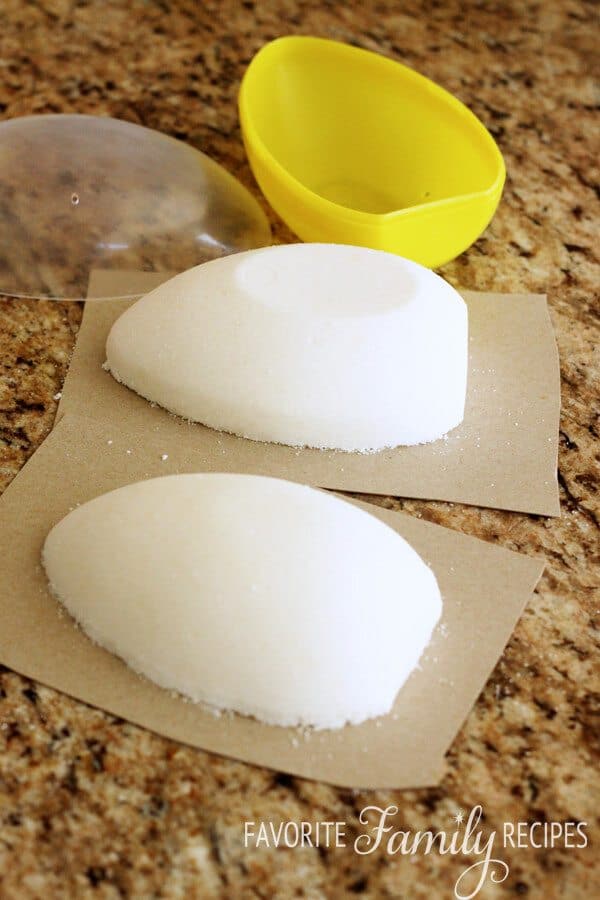
Simple pantry staple ingredients that will turn an easy mixture into an amazing Easter decoration that will last for years to come. It is simple to mix together, add in an Easter egg, then let it harden. The panoramic egg mold is the most important thing to help make this egg come to life!
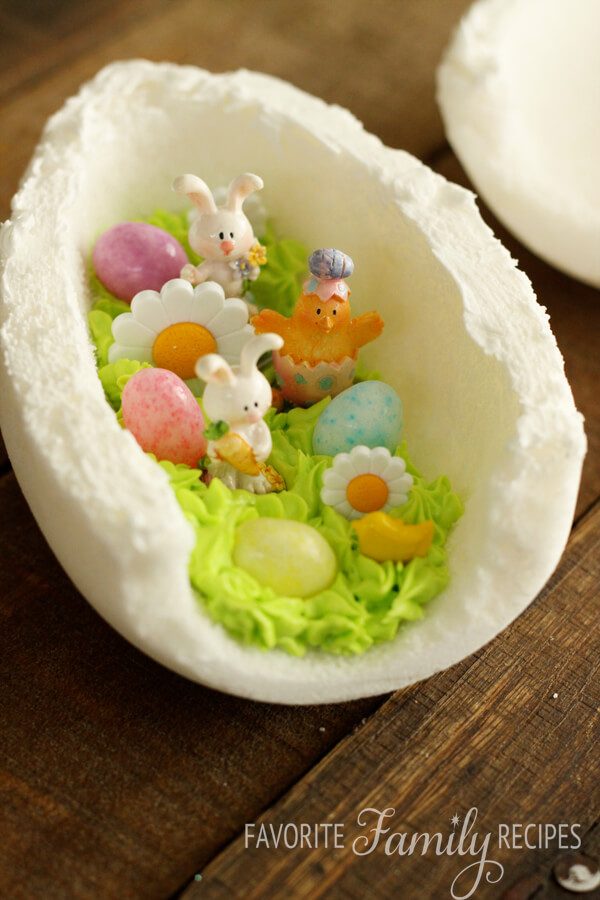
Egg mold – First of all, you need an egg mold. Find either a plastic egg at Easter time to unwrap and empty the contents or create your own. I love how they have a flat base so the egg will stand easily. Look around and be creative – you will find something! Egg white – This helps bond the sugar mixture and gives it the firmness to mold the egg shape. Sugars – Granulated and powdered sugar create the egg shape in the mold and give it the thickness that is needed to hold it together. Decorations – Jelly beans or other small Easter candies work great filling the inside of the egg mold shape. Tiny Easter figurines and decorations – Look at craft stores or online. I found the the button flowers in a craft store bin. Get creative!
How to Make a Homemade Panoramic Easter Egg
Get ready to add these to your Easter basket this year! Making sure the sugar and egg ratio is perfect plus the consistency of the mold mixture is done correctly will determine how it turns out. They are so pretty and fun to make!
The Best Panoramic Easter Eggs Ideas
There are so many variations to make these sugar molds. They are simple to make with the best tips and ideas to help you create the best panoramic Easter egg.
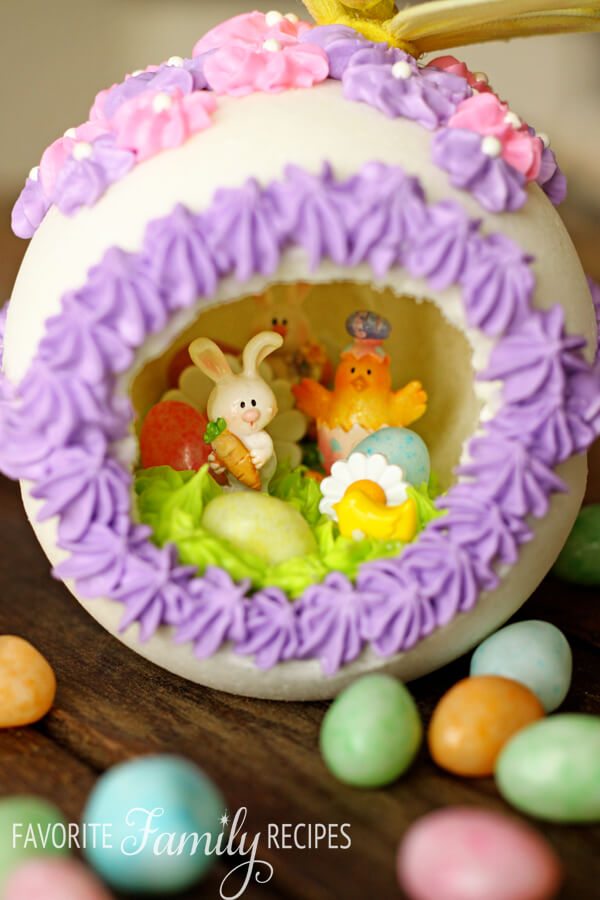
Icing – Use a pastry bag and pipe a small amount of royal icing into the bottom portion of the egg half. This is to anchor everything else you add. If you don’t want the royal frosting to show you can add a layer of green-tinted coconut or Easter grass. Hot glue – If you prefer, you can also use a hot glue gun to adhere the decorations to the Easter egg and then fill it in with Easter grass. Combine – When gluing the top half of the egg onto the decorated bottom half, make sure the two halves line up evenly. You can “glue” the two halves together with royal icing or a hot glue gun. If using royal icing, run your finger around the seam to remove excess frosting before it hardens. Pipe frosting – Use a decorative tip to pipe a frosting border along the seam where the two halves of the egg are glued together. Pipe a frosting border around the “window” opening. Decorate – Use frosting flowers, ribbons, butterflies, etc. to decorate the outside of the egg.
Readers Helpful Tips
Here are tips from our readers that have made these Panoramic Easter Eggs:
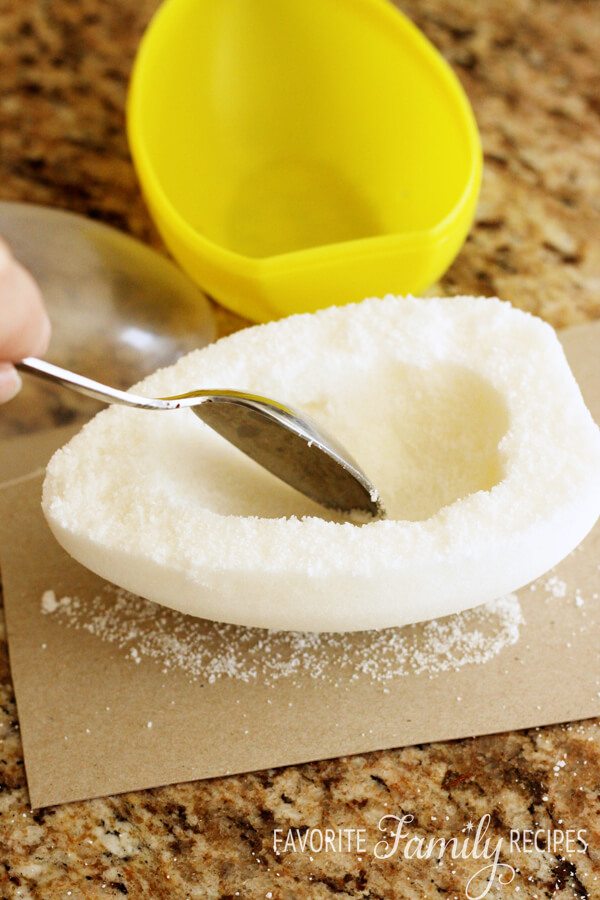
Opening you look into – When you unmold the top and bottom sugar shapes to bake, put them on a wooden board with the small ends facing each other. Cut about an inch off of each small end, scrape away that portion, and carefully push the two egg halves together so those blunt ends touch. After they have baked, take them off the board and scrape out the insides. The viewing opening will automatically form. – Virginia Using the mold – One trick I use is to perforate the viewing end, using a toothpick, so it can be easily, but carefully, cracked off when scraping the egg out. You need to make a ½ circle of perforations on the top and again on the matching bottom. Do this carefully when the sugar egg is first turned out of the mold. – Julia Decorations – I used paste food coloring for more vivid pinks, blues, and other colors for the sugar egg. Sometimes using a ribbon that went all the way around the horizontal egg with a bow on top and crafted flowers like roses that dried hard over the ribbon. The background inside could be photos of small clusters of flowers found on postcards. But, have to be small as it is the background. I used a Wilton egg-shaped 2-piece cake pan, to make a giant egg as a centerpiece to use “after” the actual cake was cut up and served, still had a centerpiece for the table. – Shelley
How to Preserve Panoramic Easter Eggs
Once it has been set, your panoramic Easter eggs are complete! To save them for future Easters, wrap them carefully in paper or plastic and store them in a box in a safe place. Do not refrigerate the egg and do not attempt to eat it! Your egg can be saved for years if stored properly.
More Easter Recipes
These are always fun and delicious ways to share a little more Easter traditions with your loved ones! These cakes, cookies, and chocolate is the perfect pairing for any Easter meal or fun for kids to help within the kitchen. Try all the Easter desserts this spring season!
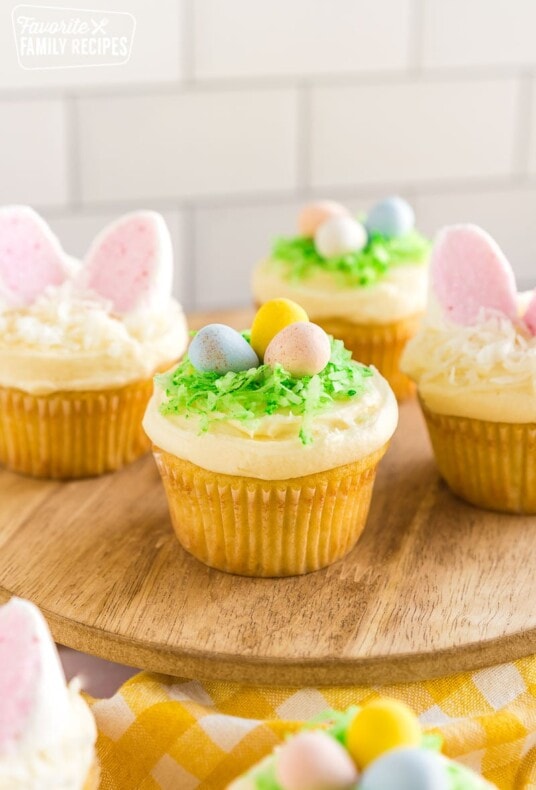
Easter Cupcakes
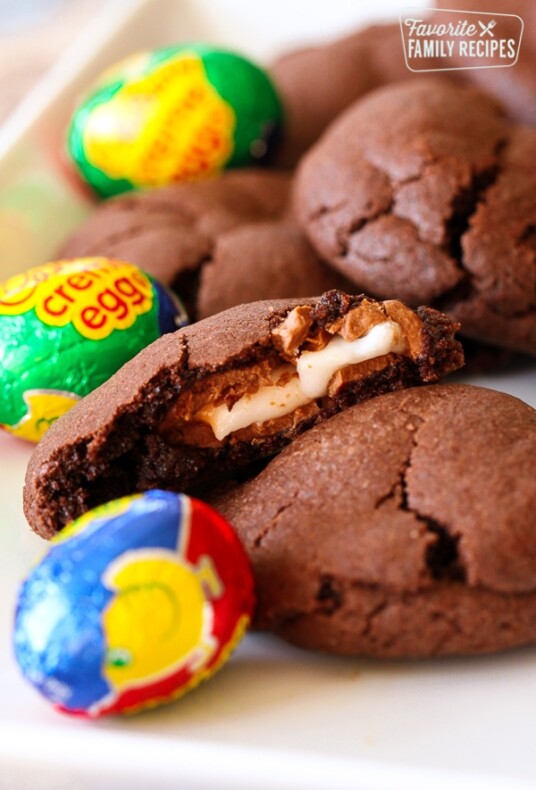
Cadbury Creme Easter Cookies
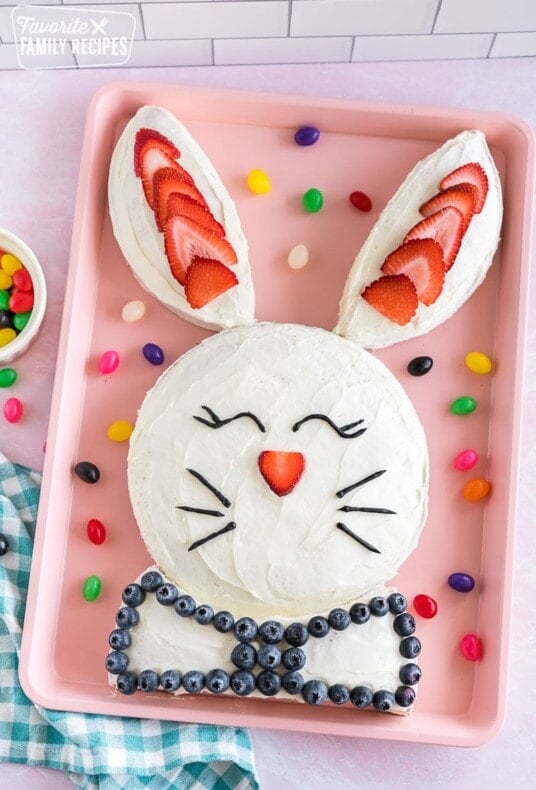
Bunny Cake
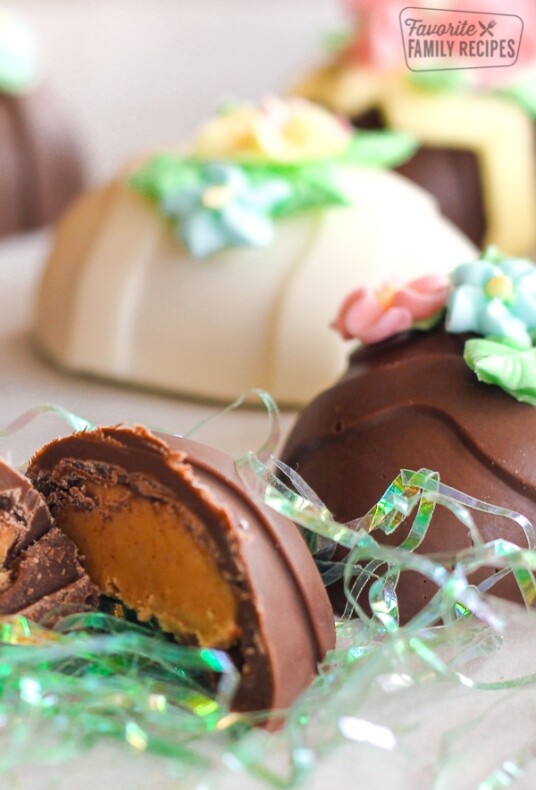
Peanut Butter Easter Eggs
We want to hear from you! Please leave a review. Rate and Review