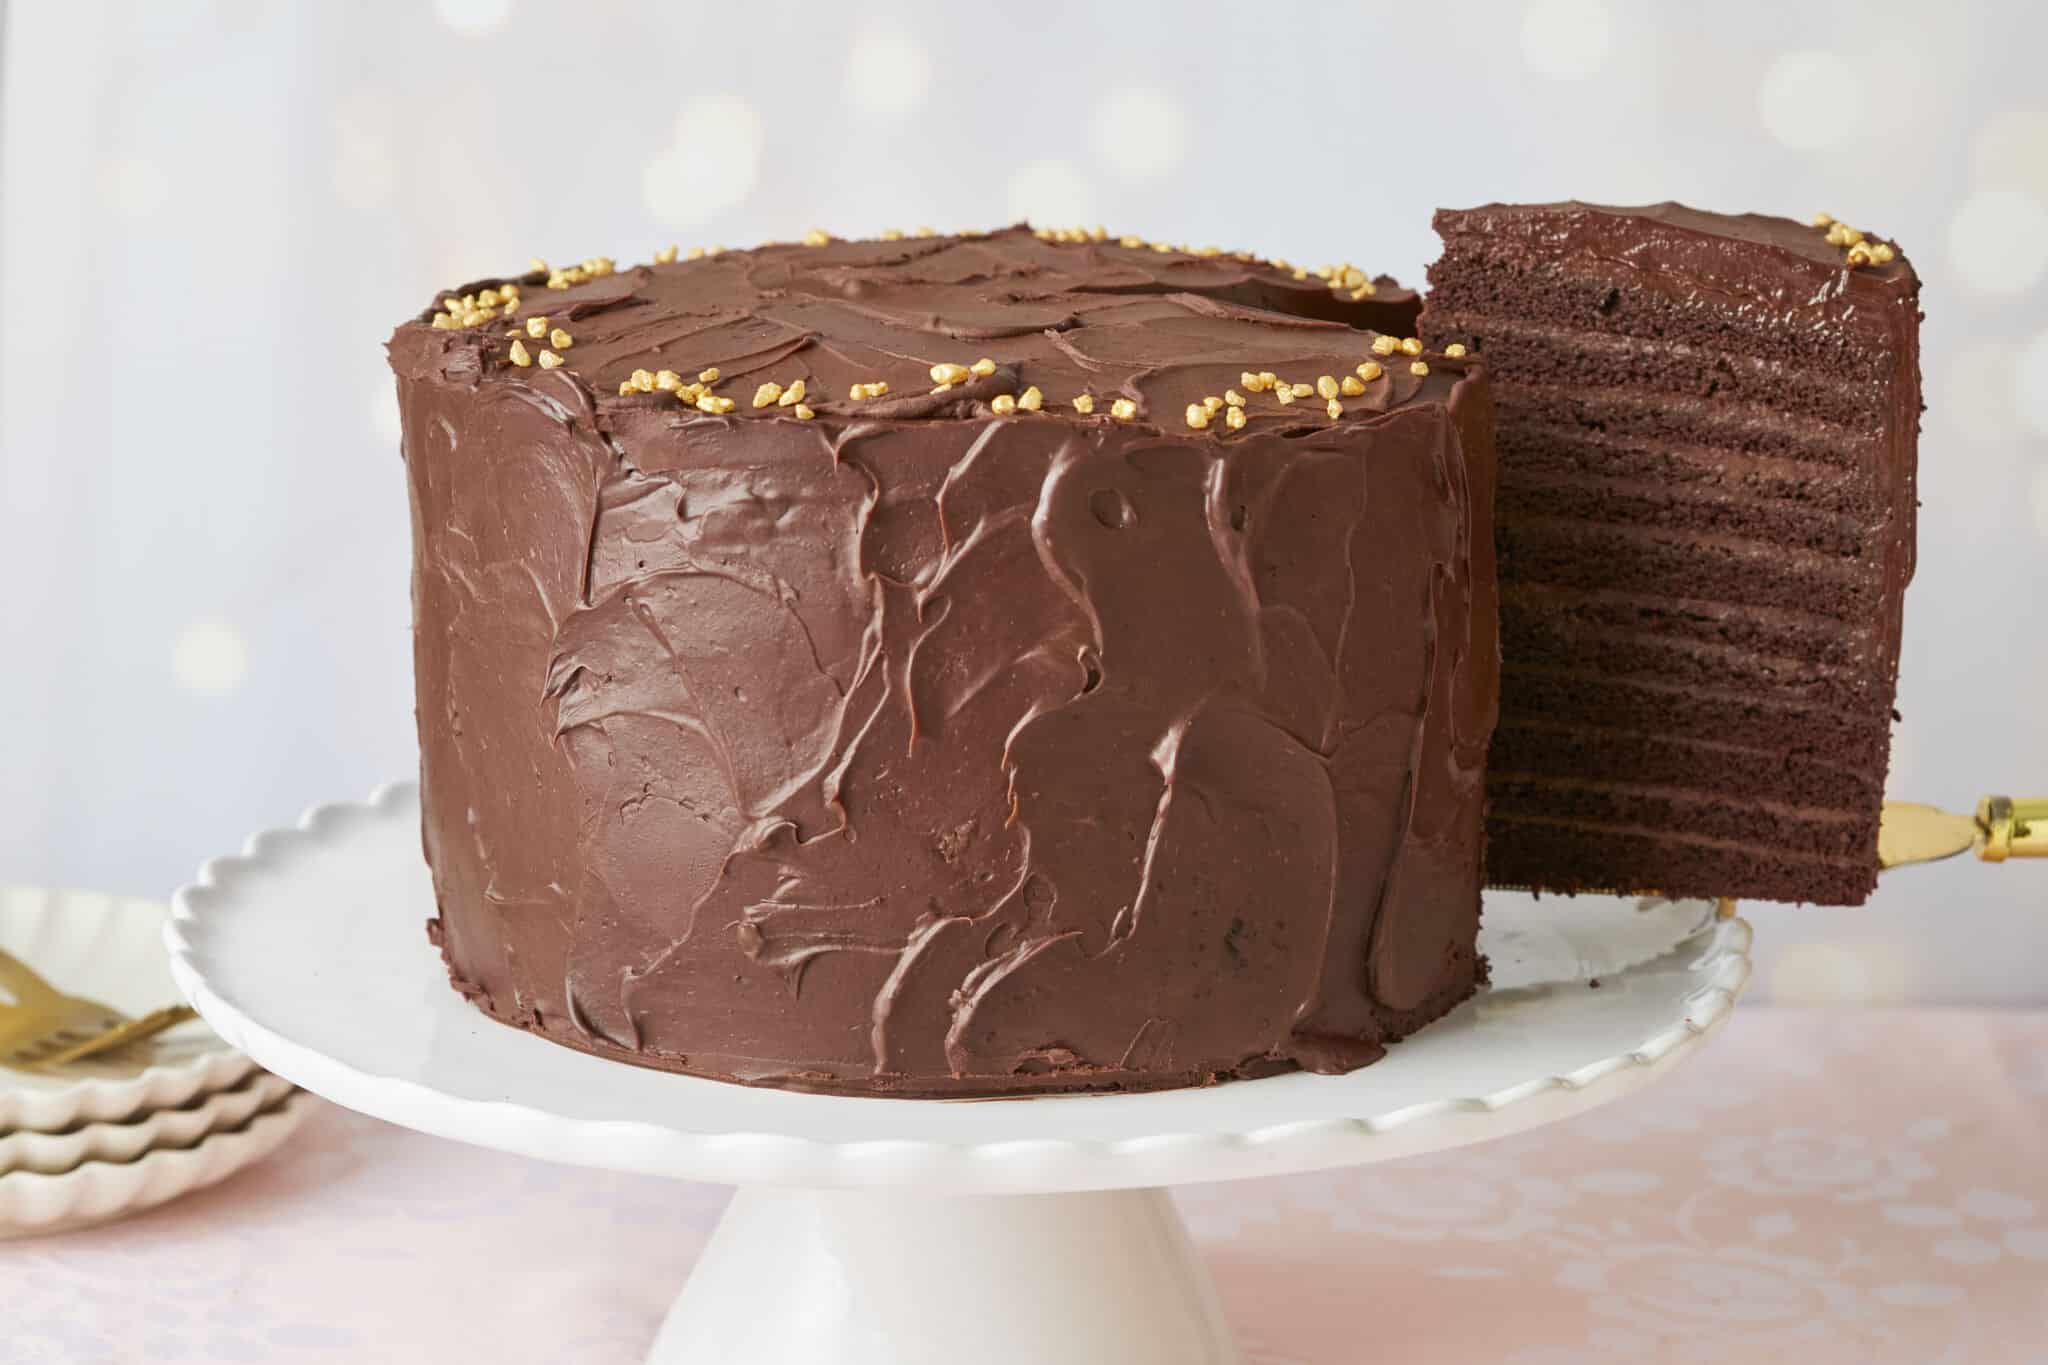
Hi Bold Bakers! WHY YOU’LL LOVE THIS RECIPE: Our Luxurious 24-Layer Chocolate Cake makes a mouthwatering statement when it’s celebration time. And we certainly have something to celebrate—it’s Bigger Bolder Baking’s tenth anniversary! Ten years of baking with you, building a strong community, discovering what you’d love to learn to cook, and developing recipes—it’s been a joy! So we’re marking this decade milestone with an elevated version of fan-favorite Best Ever Chocolate Cake with Whipped Dark Chocolate Ganache. Our Luxurious 24-Layer version is GINORMOUS! It’s two dozen fudgy layers of cake, chocolate filling, and a bittersweet and milk chocolate ganache. Go big or go home! Already have an account?
This cake is made with vegetable oil, giving it a plush texture and a moist crumb. Silky chocolate pastry cream is slathered on every layer, and the cake is enveloped in rich milk chocolate ganache.
If you’re like me, most of your kitchen time is focused on whipping up healthy breakfasts, packing school lunches, and figuring out dinners that everyone will eat! That’s why it’s so fun to dig into a gorgeously indulgent recipe like this showstopper cake. Check out more Bigger Bolder Baking favorites that bring the drama, like Stunning Tiramisu Cake, Rich German Chocolate Cake, 3-Layer Neapolitan Cake, and Salted Caramel and Chocolate Brownie Trifle. Keep reading for a FREE gift I want to give to you for this momentous occasion.
Table of Contents
What is Luxurious 24-Layer Chocolate Cake?
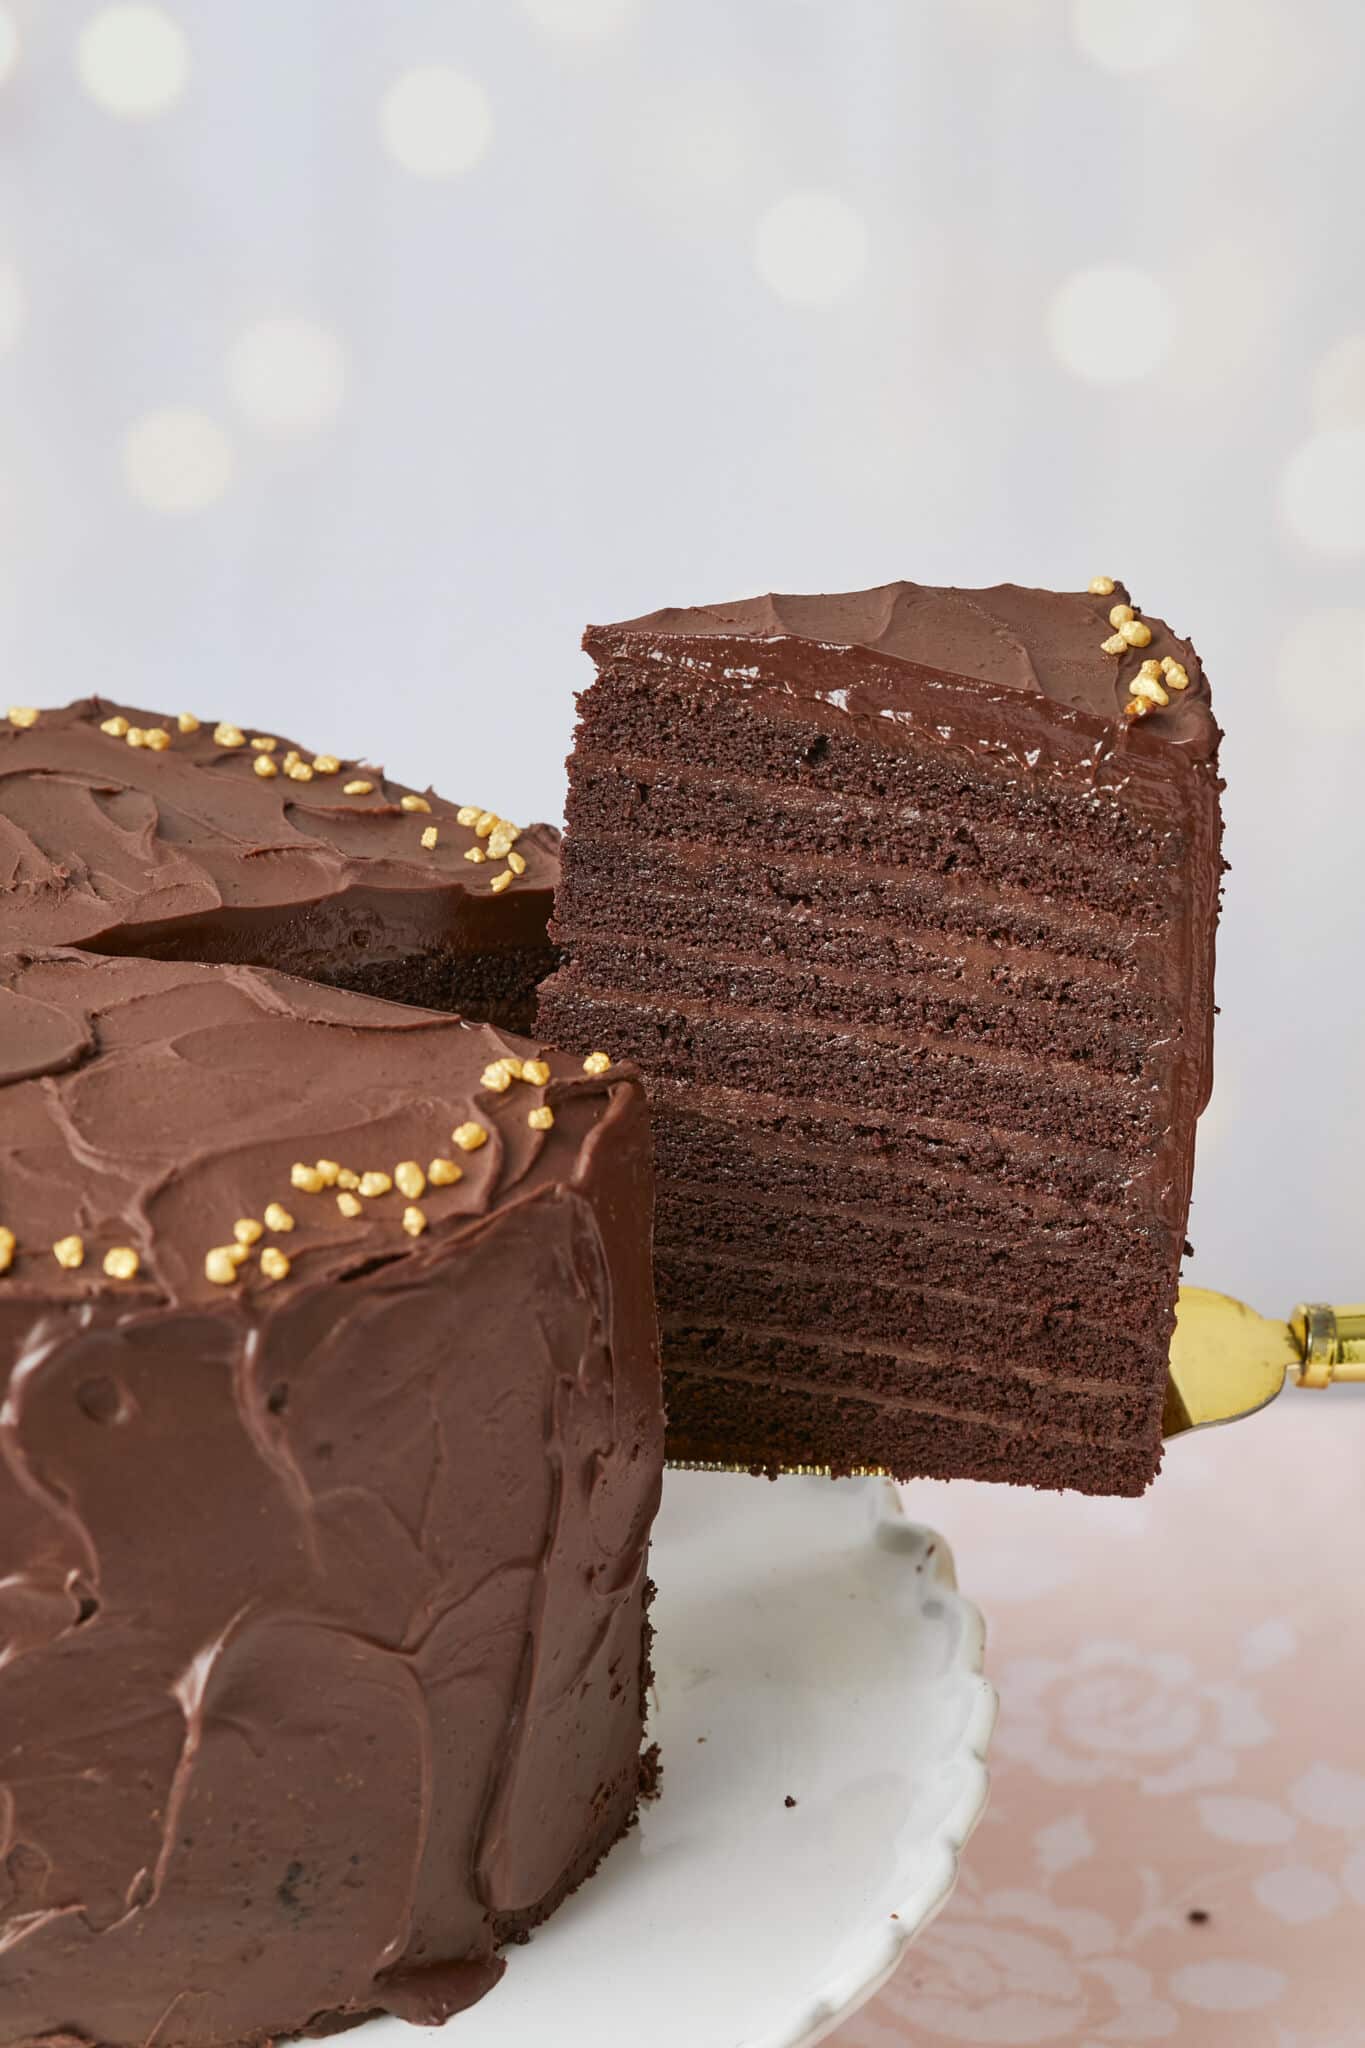
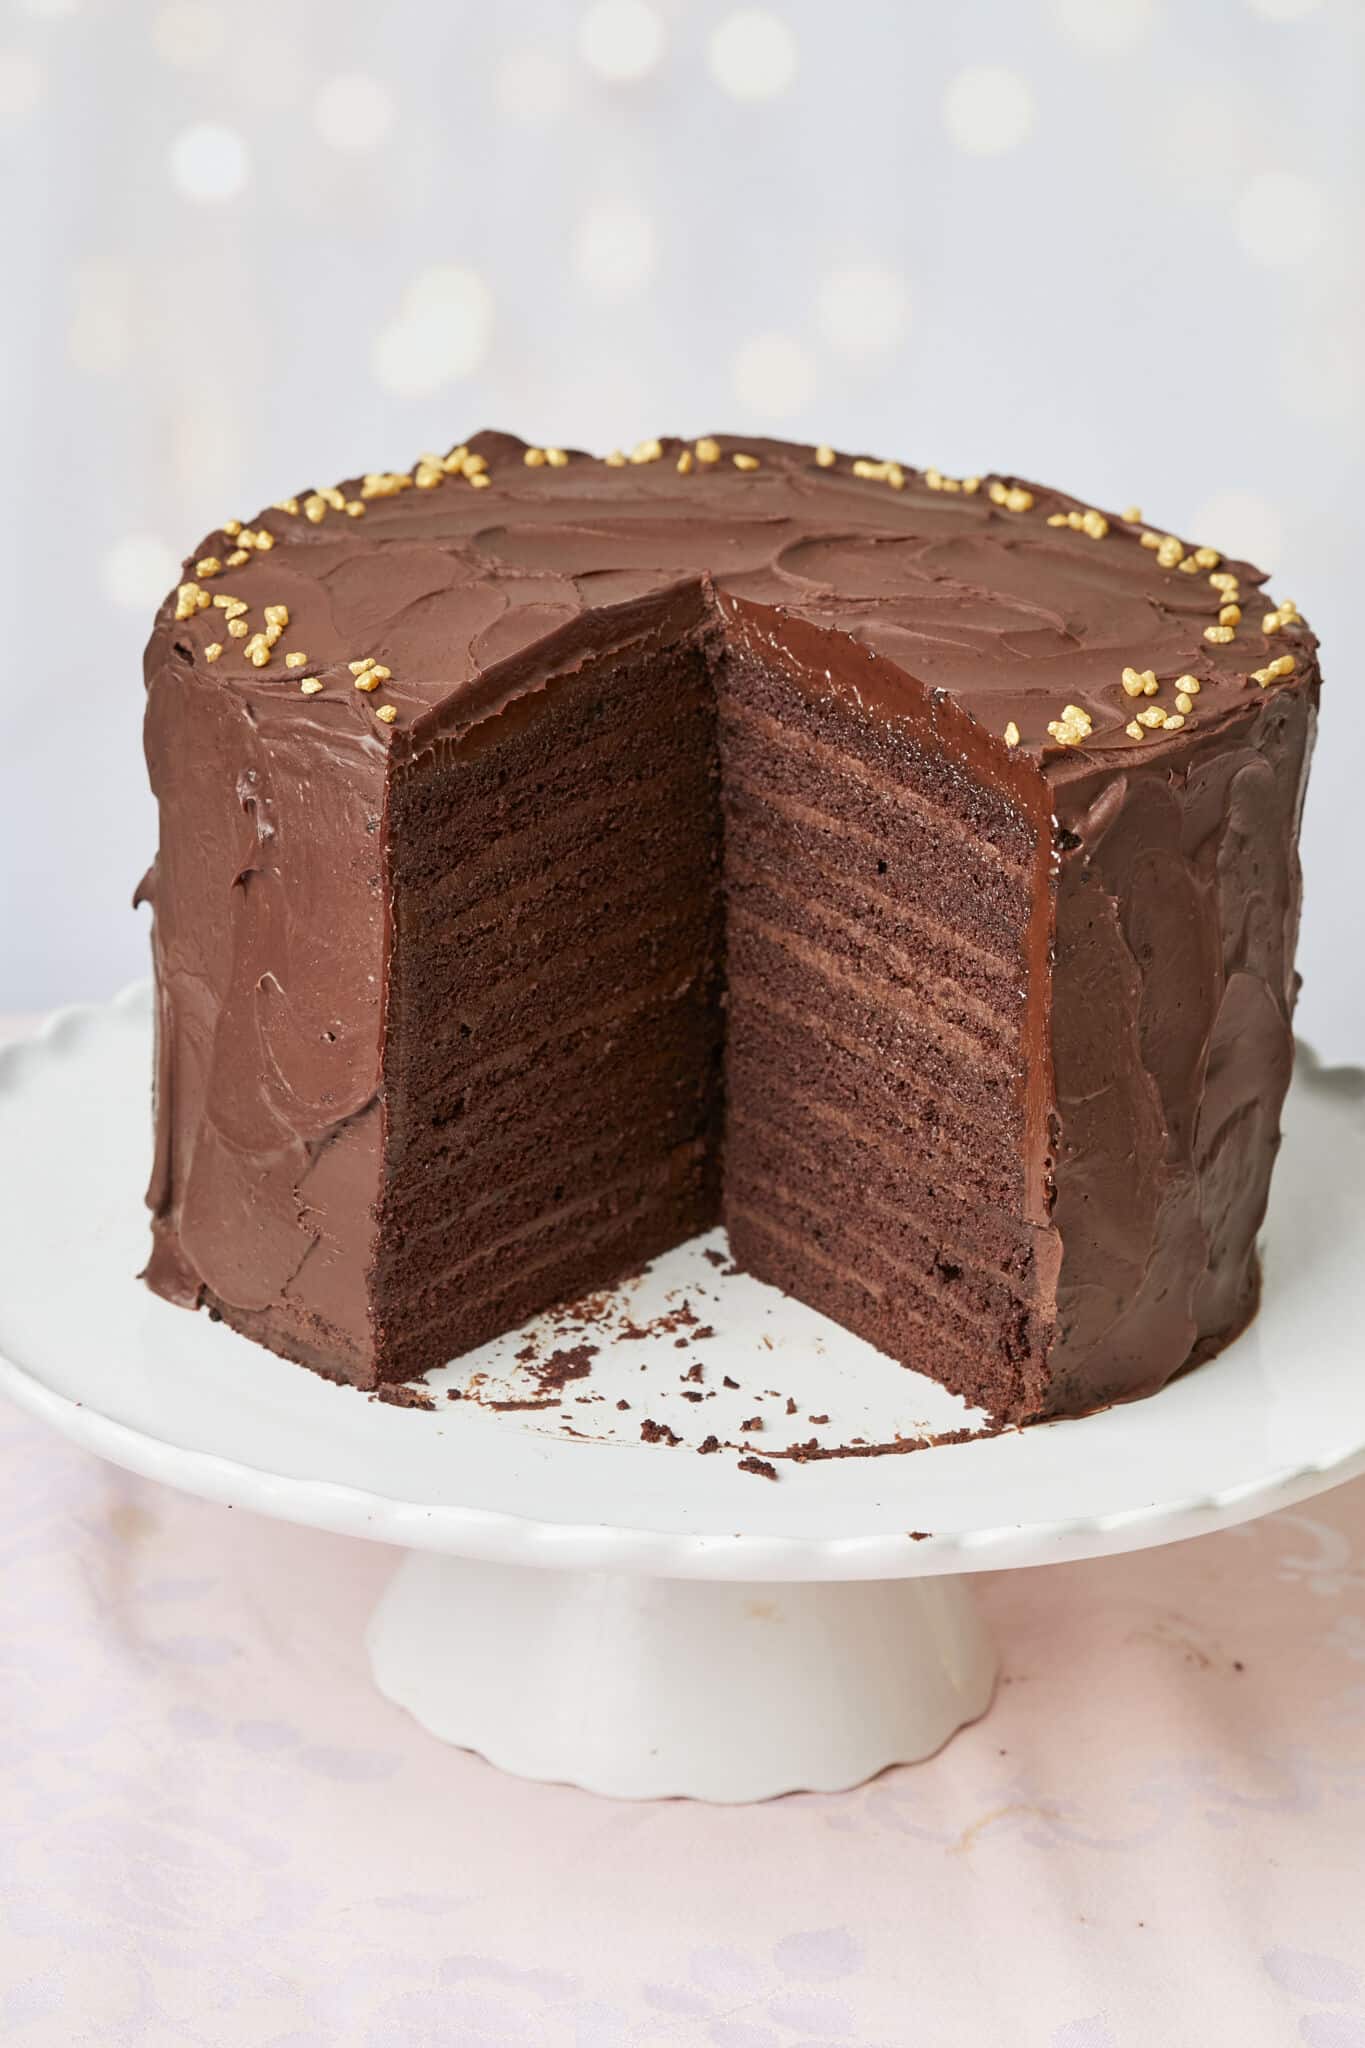
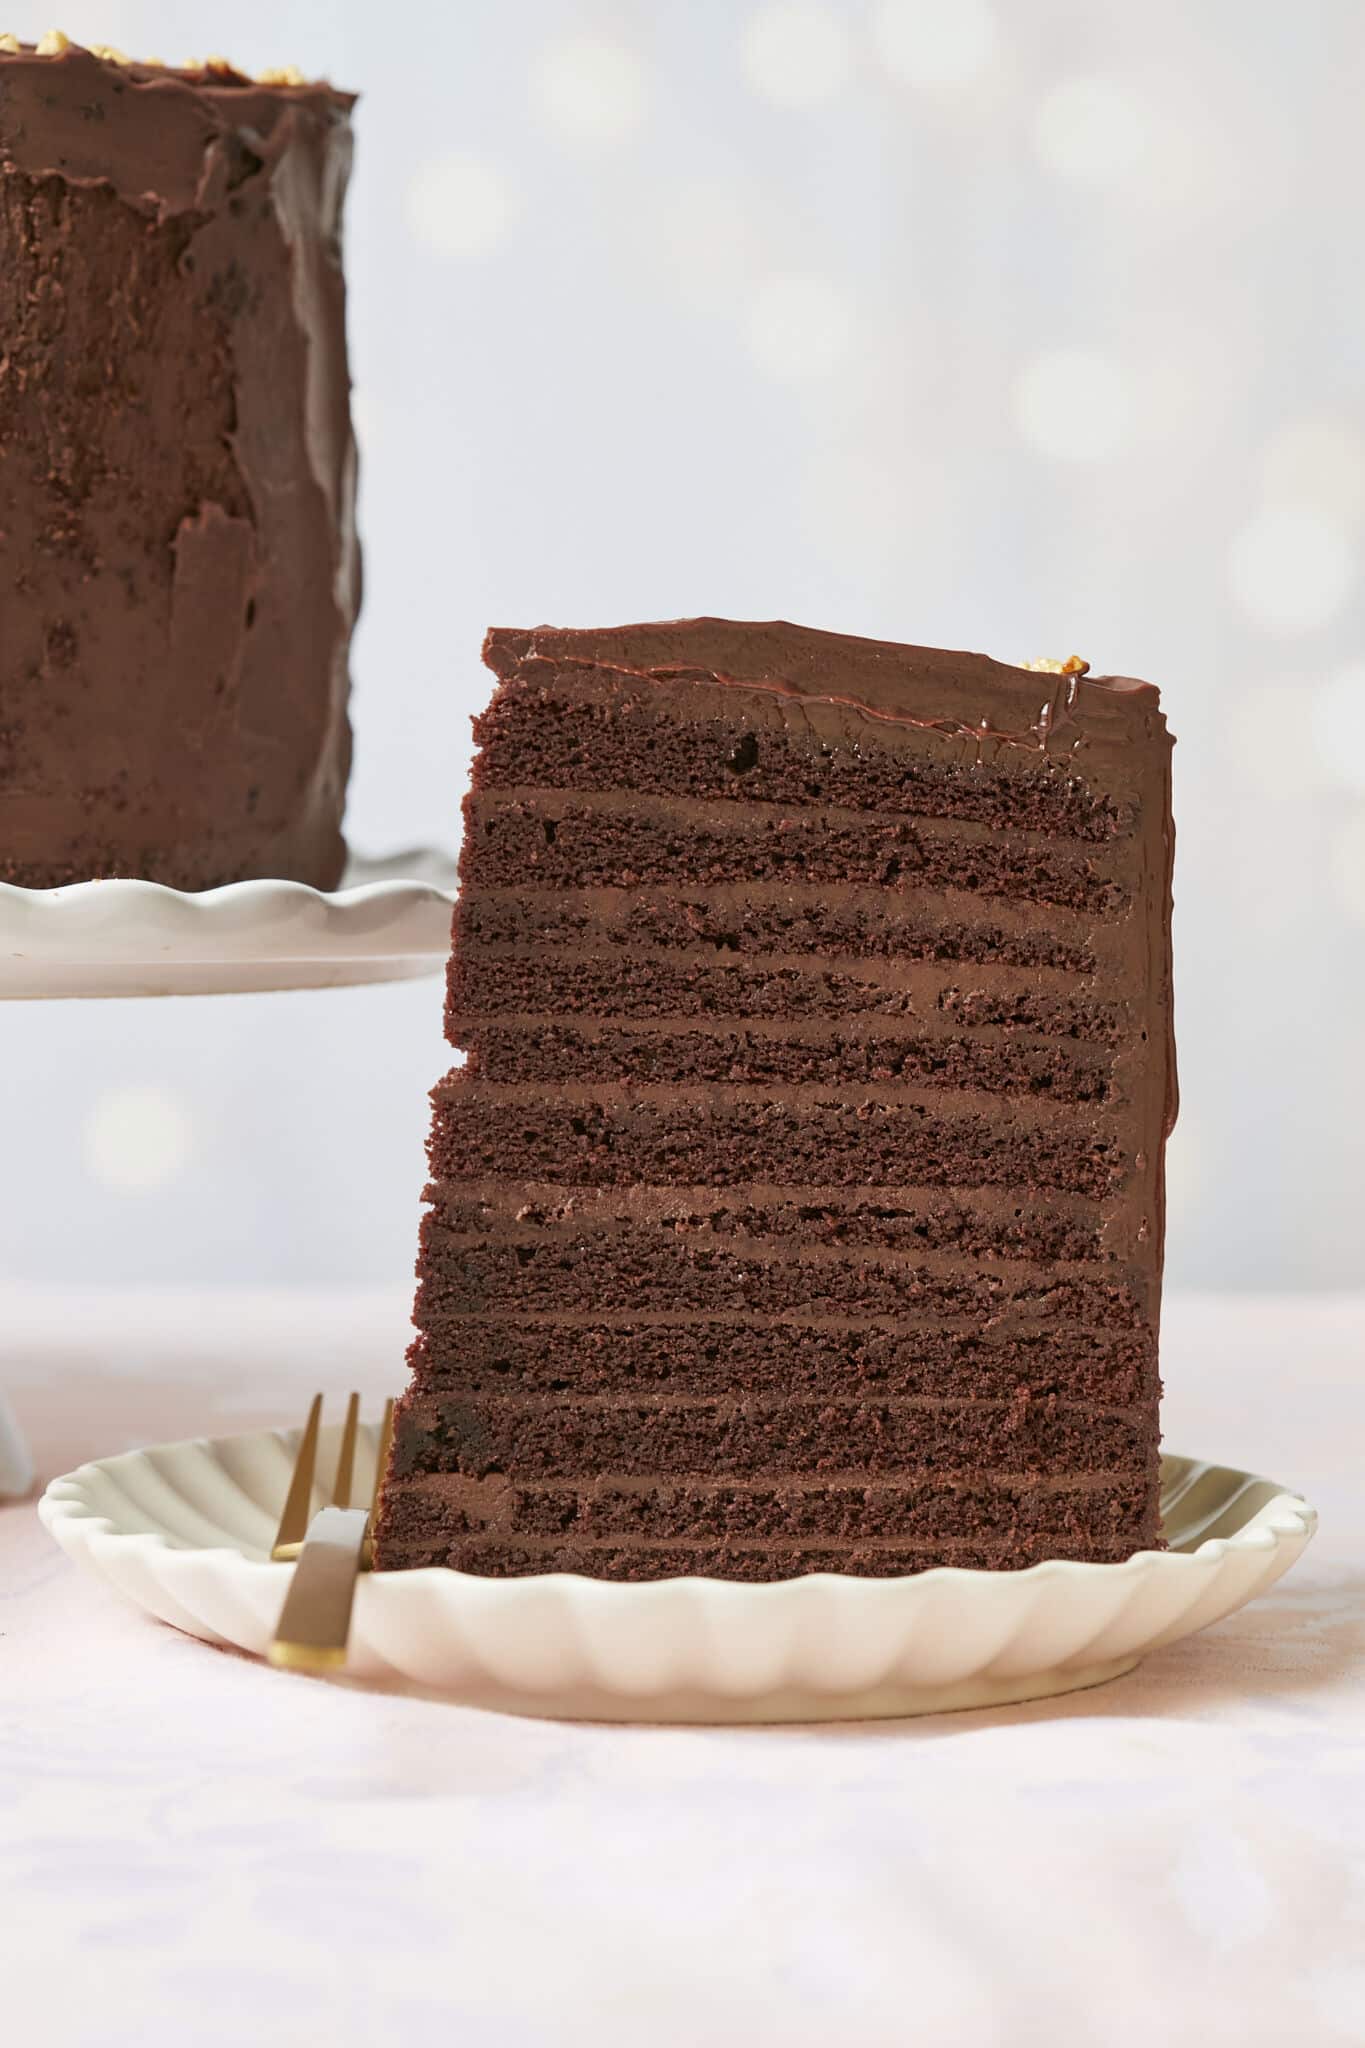
Luxurious 24-Layer Chocolate Cake is a decadent multi-layered chocolate cake made by stacking 24 individual layers with layers of chocolate filling in between. Each layer is thin, and the cumulative, visually impressive effect creates a rich and indulgent dessert. Absolutely yummy chocolate pastry cream is sandwiched between the layers, with the pudding-like filling giving the ideal textural contrast to the cake and keeping it moist! Unlike the expected chocolate buttercream, this cake is covered in swirls of decadent ganache, sending it over the edge to make the sumptuous dessert of your dreams. Layered cakes date back to ancient Greek and Roman times. After baking powder was invented in 1840, fluffier layered cakes grew in popularity, and in the Victorian Era, serving an elaborate layer cake conveyed wealth and social status. Today, a multi-layered cake is the centerpiece of a wedding, birthday, or holiday celebration.
Tools You Need
Key Ingredients and Why
For the Chocolate Layer Cake:
All-purpose flour All-purpose flour with a protein content of 9-11% is perfect for creating a cake with enough gluten development to create a necessary structure while still having a tender crumb. Granulated sugar The sugar sweetens the cake and contributes to its moist texture. Dutch-processed cocoa powder Dutch-processed cocoa powder is cocoa treated with an alkalizing agent to neutralize the naturally occurring acids, giving it a wonderfully mellow chocolate flavor. Since the Dutch process cocoa isn’t acidic, it doesn’t react with an alkaline leavener like baking soda to produce carbon dioxide. That’s why recipes that use Dutch process cocoa are usually leavened by baking powder or a mix of the two like we have in this recipe. Instant espresso powder Don’t worry, the cake won’t taste like coffee! The four teaspoons of espresso powder are here only to accentuate the chocolate flavor. Baking powder Baking powder contains both an acid (cream of tartar) and a base (baking soda), which gives it leavening power even in a cake with a non-acidic ingredient like Dutch-processed cocoa powder. Learn more about baking powder and baking soda and how to make your own. Baking soda Baking soda contributes to the rise and tenderizes the cake’s crumb. Eggs Eggs emulsify the ingredients, making a smooth and cohesive mixture. Egg proteins contribute to the cake’s structure. Use large eggs at room temperature for the best results. Here’s how to warm up eggs from the fridge. Vegetable oil Vegetable oil, a liquid fat, generally makes moister and more tender cakes than those made with solid fat like butter. The neutral taste of vegetable oil lets the chocolate flavor shine through. Very hot water Very hot water activates the cocoa’s flavor compounds and dissolves the cocoa, ensuring the mixture is lump-free and evenly dispersed. The water also hydrates the batter, improving the cake’s moisture content.
For the Filling:
One double portion of Chocolate Pastry Cream
For the Milk Chocolate Ganache:
Heavy whipping cream The fat content in heavy cream is around 36%. This high-fat content is crucial to creating a stable ganache mixture that won’t split. Heavy whipping cream gives the ganache a velvety mouthfeel and rich flavor. Milk chocolate Creamy milk chocolate has 38-42% chocolate solids and a high milk content. It lends contributes to a creamy, smooth ganache. Milk chocolate is sweet and is known as “eating chocolate.” Its mild flavor keeps the ganache balanced and not overwhelming. Bittersweet chocolate The robust flavor of bittersweet chocolate gives the ganache and bold cocoa flavor. It marries well with milk chocolate for the perfect balance of sweetness and chocolate intensity.
How to Make 24-Layer Chocolate Cake
Prepare to bake: Preheat the oven to 325°F (165°C) with the fan on, butter four cake pans and line them with parchment paper. Put a cake board on the cake decorating stand. Combine the dry ingredients: In a stand mixer, combine the flour, sugar, cocoa powder, espresso powder, baking powder, baking soda, and salt on low for 30 seconds. Mix the wet ingredients and finish the batter: Add the eggs, oil, vanilla extract, and 1/2 cup (4 fl oz/120 ml) of hot water. Mix to moisten. Add the remaining hot water in two additions, scraping the bowl down with a silicone or rubber spatula, and mix to combine. Bake and cool the cake layers: Pour the batter into the prepared pans. Bake in the preheated oven for 30 to 35 minutes until a cake tester or toothpick comes out clean. Let the cakes cool completely. Wrap the layers well in cling film and chill in the fridge for at least four hours. Make the Milk Chocolate Ganache: Place the finely chopped milk chocolate and bittersweet chocolate in a heatproof bowl. Heat the cream just to simmering, and pour over the chocolate. Let it sit for five minutes, and then stir until combined. Let the ganache sit at room temperature, stirring occasionally, until thickened. Assemble the cake: Cut each cake into three layers. Put one cake layer on the cake board on the cake decorating stand. Spread evenly with ½ cup (4 oz/115 g) of pastry cream. Repeat the process until all of the cake layers have been used. Spread the remaining pastry cream over the cake as a crumb coat, and refrigerate for one hour. Frost the cake: Take the cake out of the fridge and place it back on the cake decorating stand. Spread the chocolate frosting evenly but quickly (the will ganache quickly firm up when applied to the chilled cake). Serve right away or refrigerate.
Can I Make 24-Layer Chocolate Cake in Advance?
Yes, you can make elements of 24-Layer Chocolate Cake in advance so it will take less time to assemble.
Make the cake layers in advance: Wrap the baked cakes well and store them in the refrigerator for up to four days. For more extended storage, place the well-wrapped cakes in a freezer bag and store them in the freezer for three months. Make the ganache in advance: To store in the refrigerator: Place a piece of plastic wrap directly over the surface of the very warm ganache to stop it from forming a hard skin. After the ganache has cooled completely, place it in an airtight container and store it in the fridge for up to seven days. When ready to use the ganache, gently reheat it by putting the ganache in a heatproof bowl and placing the bowl in hot water. Stir until spreadable. I do not recommend freezing ganache as the consistency would not be the same once thawed.
How to Store 24-Layer Chocolate Cake
Store leftover cake in the refrigerator for up to two days. Leave the cake out at room temperature for 30 minutes before serving.
How do I make a 24-Layer Chocolate Cake without a large capacity mixer? Since this is such a large cake batter, you will need a large capacity model if you want to use a mixer. If you don’t have a large-capacity mixer or four cake pans, you can divide this cake recipe in half and make it in two batches. To do this without making errors, it is best to print out the recipe, go by weight, and use a calculator to half all of the amounts. Make notes on your recipe before measuring everything, and use a kitchen scale for accuracy. If you don’t have a stand mixer, you can also mix each batch with a hand-held electric mixer or mix it by hand.
How do I make sure my ganache doesn’t split? Be sure not to overheat the cream. It’s best to use a heavy bottom saucepan and warm the cream on LOW heat just until it starts to simmer–look for tiny bubbles around the edges. Use finely chopped chocolate bars instead of chips. Chocolate chips have added ingredients to keep them from losing shape, so it’s hard to melt them completely. Overmixing will separate fat from chocolate to break the ganache. Do not overheat the chocolate. Let the heated cream sit with the chocolate, and do not stir for five minutes. This process will melt chocolate evenly without causing it to seize. SLOWLY stir chocolate and cream together from the center until it’s nice and smooth. Swirling the bowl will help the chocolate to melt without overmixing. As it cools, it will thicken up more. To fix broken ganache, warm the mixture in a bowl over a pot of simmering water while whisking vigorously using an immersion blender. If that doesn’t work, add in a small amount of room-temperature milk while continuing whisking. Don’t use cream to restore your ganache because the mixture already contains too much fat to come together.
How do I keep my cake layers from breaking when I cut and stack them? Making cake layers that won’t crack and that stack well starts when you mix your batter. Avoid overmixing, as that can incorporate too much air and create large air bubbles in the cake, making the layers challenging to cut and stack. Cutting a baked cake into thinner layers is called torting. Chill the baked cakes for at least four hours, and preferably overnight, before torting. Warm cake is too fragile to cut. If you’re a little nervous about torting, you can put the cake on the decorating stand, view it at eye level, and score it or mark with toothpicks before you cut. When cutting the cake with a serrated knife, lightly put a hand on the top of the cake (do not use too much pressure), and use a gentle sawing motion to cut. Consider using an extra cake board to move each layer to minimize the chance of breakage.
Gemma’s Pro Chef Tips
If your oven doesn’t have a fan, note to put cake pans on different racks and rotate them halfway through. Bake at 350°F (180°C) for around 30-35 minutes or until a cake tester or toothpick comes out clean. The cake layers need to be chilled before splitting and assembly, or they will be too tender to handle. A rotating cake decorating stand is preferable for decorating this cake because it is essential that the layers are even. There are many layers, and if they start to tilt, the whole cake may fall over due to the height. As you place the layers, you can rotate the stand to see the cake from all sides. Of course, you can fill and frost this cake without a decorating stand, but be sure to look at the cake from all sides after each layer of cake and filling. The cake board is a round piece of cardboard that you can build your cake on. Since this is such a large cake, it is easier to fill and frost it on a board so it can be lifted from the decorating stand to the refrigerator and to your serving plate. The layers of pastry cream will seem very thin, but this is to ensure the structural integrity of the cake. If the pastry cream layers are too thick, they can slip. An offset spatula is the best tool to spread the pastry cream and ganache evenly. Because this cake is filled with pastry cream, it must stay refrigerated. Most cakes taste better at room temperature, but because this is an oil-based cake, it remains soft and moist even when cold. The ganache has enough cream that it will also stay soft while cold. Serve this cake with a generous dollop of Freshly Whipped Cream, Chocolate Whipped Cream, or Two-Ingredient Vanilla Ice Cream!
More Chocolate Cake Recipes
Best-Ever Chocolate Cake with Whipped Dark Chocolate Ganache Beyond Moist Vegan Chocolate Cake Flourless Chocolate Cake The Ultimate Texas Sheet Cake Decadent Chocolate Pound Cake
Free Bonus for You!
Don’t forget to get your FREE digital 10th Anniversary Cookbook. It’s a curated collection of our top recipes over the years that have been tested, approved, and loved by you all! I hope you enjoy it and happy baking, Bold Bakers!