Hi Bold Bakers! WHY YOU’LL LOVE THIS RECIPE: These chocolate scones are far from traditional, but no less amazing. With every bite, you are immersed in chocolate flavor from the bittersweet cocoa in the scone itself, to the rich chocolate chips, to the sweet chocolate glaze that graces the top. Whether it’s a special occasion or just another breakfast or afternoon tea, try my chocolate scones! Already have an account? IMPORTANT NOTE: This recipe was updated and improved on 8/31/23, to include a step-by-step tutorial video, answers to the most frequently asked questions and more Chef’s Pro Tips. What is it that makes scones so delightful? Is it the warm, sweet scent when they are first pulled from the oven? Is it the way the butter and a touch of salt mingle with the bit of sugar? Or, would you say, it’s that flaky texture that gives way to a soft center? However you love your scones, just imagine all this…with chocolate! One heavenly bite of my chocolate scones and you won’t stop wondering where these have been all your life! You may never look back! [ Want a Traditional Irish Scone? Make my Best-Ever Irish Scones! ]
Table of Contents
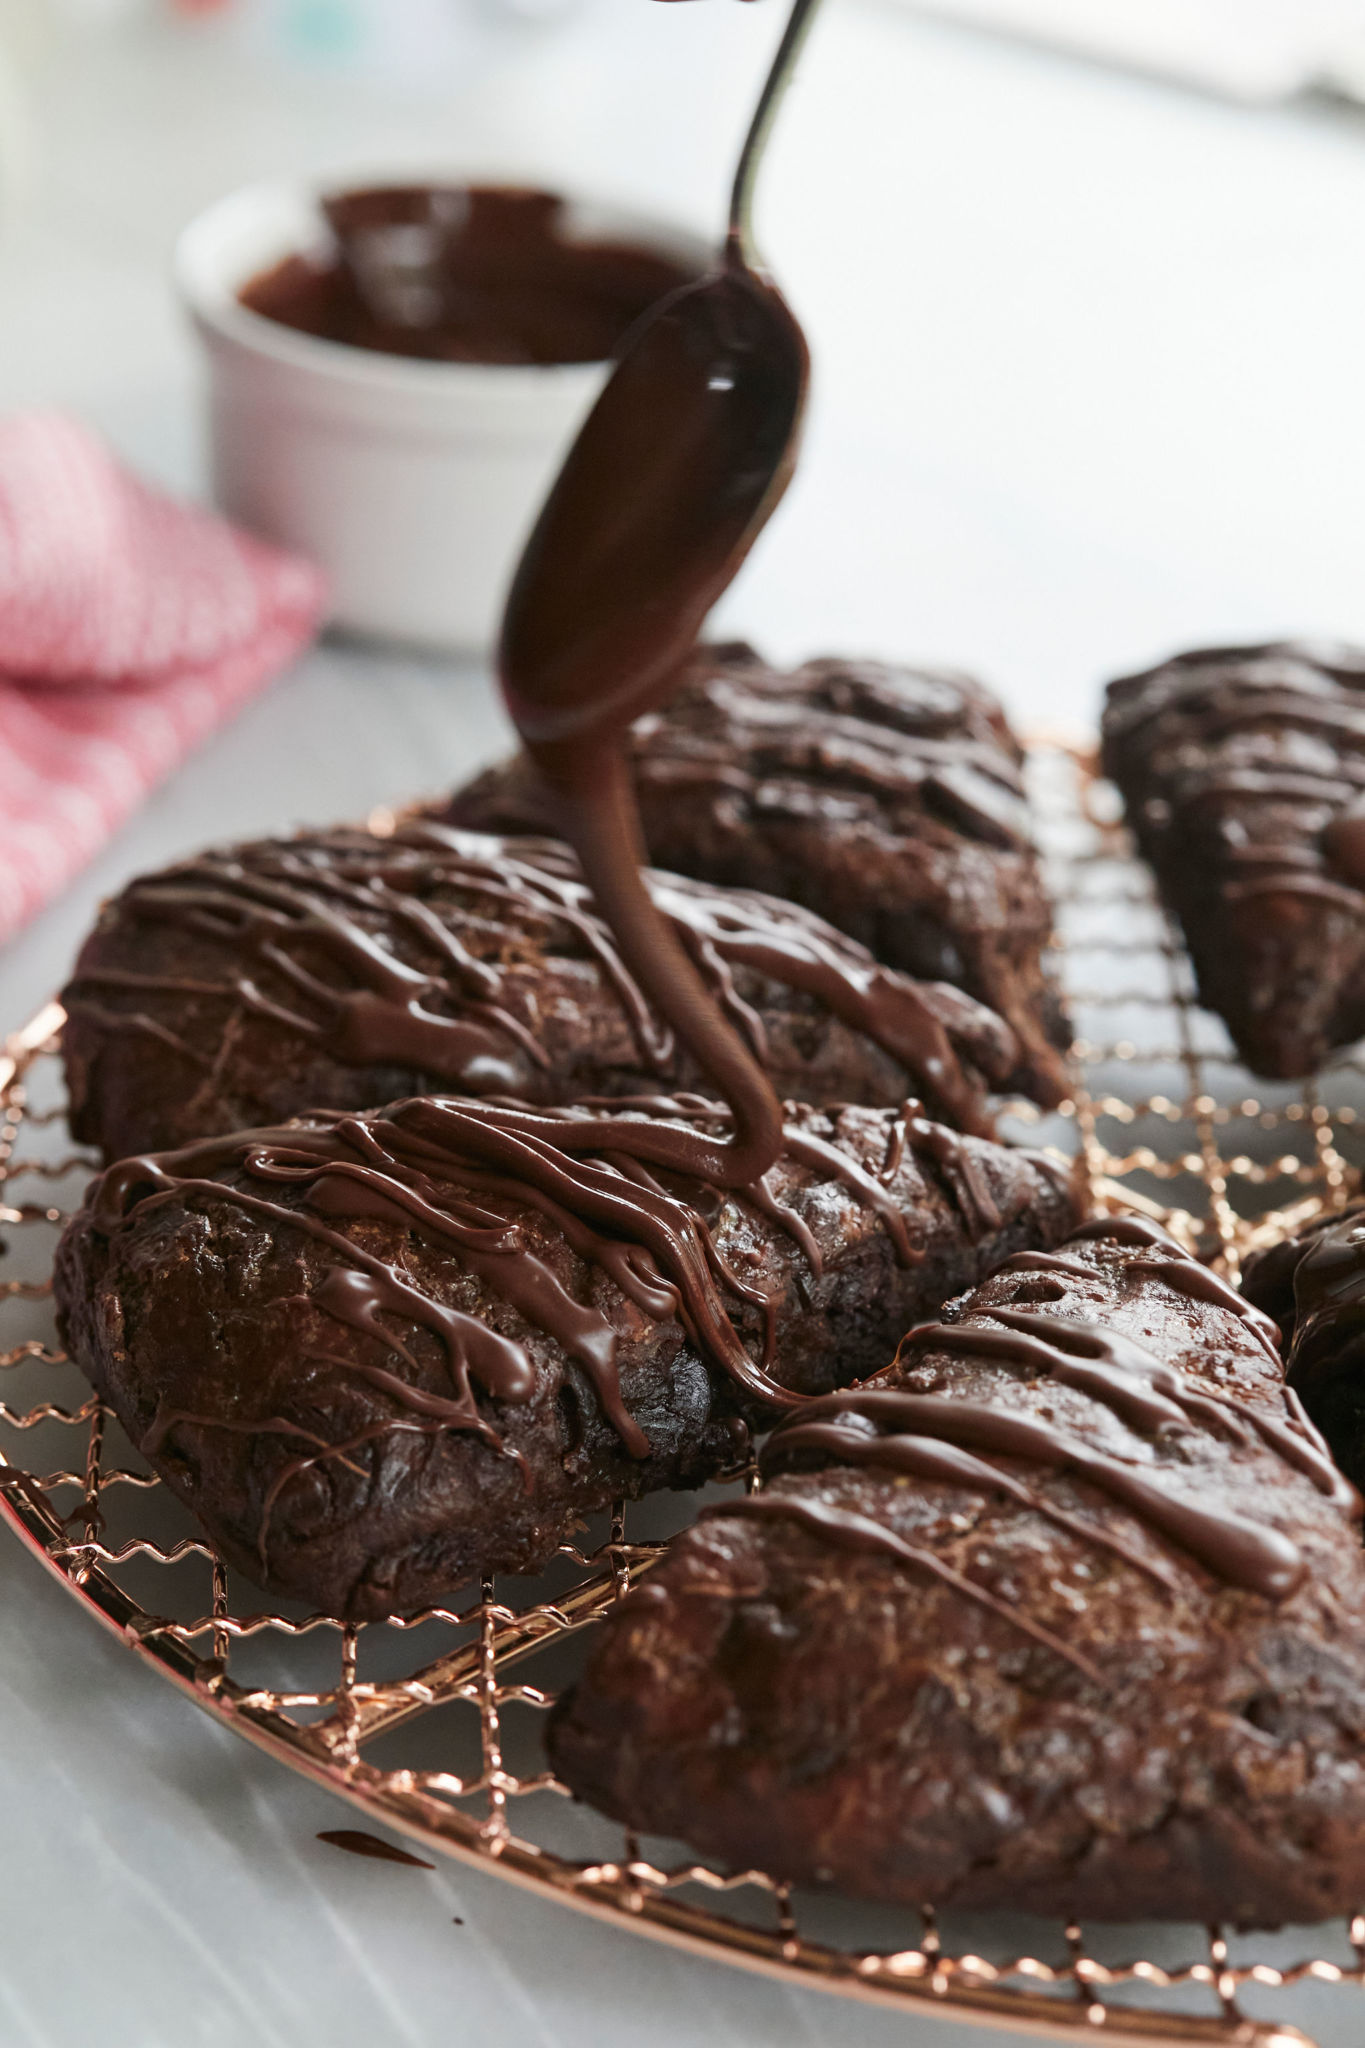
What Are Chocolate Scones?
A scone is a traditional Irish baked good, made with wheat flour and butter, that is a sweeter version of an American biscuit. It is denser than a muffin, and softer and cakier than shortbread. A chocolate scone is all this with cocoa powder and chocolate chips added in! The result is a scone that has a rich, chocolaty taste while still retaining the characteristic crumbly and slightly dense texture of a traditional scone.
Key Ingredients and Why
All-purpose flour (aka plain flour) All-purpose flour has protein around 8-11% which ensures scones a sturdy enough structure to hold shape or mix-ins without being tough. You can use gluten-free flours and be sure to check out my tips below. Unsweetened cocoa powder Use Dutch-processed cocoa powder, unsweetened natural cocoa powder, or cacao powder (from raw cacao beans) for an intense and robust chocolate flavor. Granulated sugar Sugar sweetens chocolate scones, balancing out the bitterness from cocoa powder. It tenderizes chocolate scones by weakening gluten formation, and softens scones by holding onto and adding moisture. In addition, sugar coats air bubbles to retain air, making scones rise so the results are not too dense. Last but not least, sugar contributes to the browning process through Maillard reaction, leading to a visually-appealing dolden-brown color. You can use sugar substitute of your choice from my Sugar Substitute Chart. Baking powder The baking powder gets activated when mixed with liquid and exposed to heat. This produces carbon dioxide gas bubbles to make scones expand and rise, contributing to the scones’ light, airy, and less dense texture, resulting in a more aesthetically pleasing final product. Salt Salt enhances the scones and complements the sweet and bitter flavors. Butter Make Homemade Butter for the freshest superior taste and creamiest consistency. I always use salted butter for extra flavor from salt but unsalted butter will work as well. FROZEN butter contains colder water (than non-frozen butter), which will evaporate during baking to help scones rise and create layers. Heavy cream Taste: Heavy cream enriches chocolate scones, Appearance: It binds ingredients together, leading to the even distribution of chocolate chips. And it contributes to the browning, giving the exterior a deep beautiful color. Texture: Heavy cream not only adds moisture to scones but also helps create a tender crumb by coating the flour particles and inhibiting gluten formation. This leads to a more delicate, melt-in-your-mouth texture rather than a tough and chewy one. Milk I use full-fat/whole milk. Another milk of your choice will also work here. (Adjust it accordingly to get the same consistency dough as the video. ) Egg wash Egg wash keeps scones moist and produces a shinny exterior. You can use beaten whole egg, egg yolk with water, milk, yogurt, or melted butter. Powdered sugar Powdered sugar is finer than granulated sugar or caster sugar, leading to a smooth glaze. You’ll never run out of it when you start using my recipe for Powdered Sugar. Vanilla extract Vanilla extract enhances the overall flavor of chocolate scones. Make your own using my recipe for Homemade Extract at a fraction of the store price! Chocolate chips You can use milk chocolate chips, bittersweet chocolate chips, or dark chocolate chips.
Tools You Need
Measuring cups and measuring spoons Parchment paper Baking sheet A floured surface for kneading Mixing bowls Whisk Pastry knife, pastry cutter or two forks Pastry scraper
How To Make Chocolate Scones
How Do I Store Chocolate Scones?
Store chocolate scones in an airtight container at room temperature for up to three days. For longer storage, place in an airtight container in the freezer for up to two months. Because of the chocolate glaze, these scones are best defrosted slowly at room temperature for an hour or two.
Can I make these chocolate scones gluten-free?
Check out my Guide to the Best Gluten-Free Flours for details. Use one-half to three-quarters of the amount of liquid called for, and then add more if needed to get the same consistency as what’s called for in the recipe.
Can I freeze individual raw scones?
Yes, once the dough is formed and cut into individual scones, you can freeze them as needed. When it’s time to bake, take them out of the freezer to thaw at room temperature for about 10-15 minutes then bake at 400°F (200°C) for roughly 25-30 minutes or until golden brown all over on the outside.
How do I reheat chocolate scones?
If you have frozen scones, defrost them at room temperature while preheating the oven for roughly 15 minutes. Reheat your room-temperature or defrosted chocolate scones at 350°F(180c°) for 10 minutes or until warm throughout.
Gemma’s Pro Tips For Making Chocolate Scones
Prep Your Space! Have your baking sheet and a floured surface for kneading ready before you begin—this will allow you to work quickly once you have the dough mixed. Use COLD butter! Cold butter makes the dough easier to handle and gives you the best-textured scones! For this recipe, you can either grate frozen butter or cut butter into very tiny cubes and freeze for 5 or 10 minutes to make sure it doesn’t melt as you are mixing the dough. If you have trouble keeping butter cold during kneading, you can also grate frozen butter using a box grater and putting them into the flour. You can do this whenever you have time, and then keep butter curls in the freezer. This is the trick to making these the biggest and boldest scones. Don’t over-knead! It is very important not to over-knead your dough, or you will have dense scones. Once you add the liquid, combine quickly, just until the dough holds together. Chill out! After cutting out your scones, let them chill in the refrigerator for 15 minutes to let the butter firm up and let the gluten relax. Do this and you’ll be rewarded with tender scones! Elevate your chocolate scones with butter and jam!
Make More Scone Recipes!
Gemma’s Best-Ever Irish Scones Fresh Blueberry Scones Simple Raspberry Scones Easy Chocolate Chip Scones Pizza Scones
IMPORTANT NOTE: This recipe was updated and improved on 8/31/23, to include a step-by-step tutorial video, answers to the most frequently asked questions and more Chef’s Pro Tips. Don’t forget to buy my Bigger Bolder Baking cookbook!