Hi Bold Bakers! You know I am not one for finicky desserts, and you also know that I love to do little work and still yield an impressive, professional-looking creation! Work smarter, not harder, you know? And that is exactly what I have done this Holiday season. I have created 5 simple pie decorating techniques to transform your holiday pies into show-stopping desserts. By the end of this article, you’ll take my years of culinary and professional baking experience, and you will no longer be intimidated by beautiful pie designs! Below are five designs that you (yes, YOU!) can do easily!
Pie Design & Decorating Tips To Get You Started
These designs are made with my perfect flaky pie crust, which is very forgiving and easy to handle. When making the dough, I always say to add a minimal amount of liquid and handle the dough as little as possible for the most tender dough – but in the case of these more intricate crusts, go ahead and add the full 3 tablespoons of ice water and give the dough extra few kneads (don’t over-do it – just 3 or 4 extra kneads) just to keep things pliable before chilling the dough. Make sure to remove your chilled dough from the refrigerator about 20 minutes before you want to roll it (it should still be cool – too warm and it will be difficult to handle and too cold and it is more likely to crack). When you are rolling out your top crust – if it is very firm and starts to crack, knead the dough together again and let it sit for 5 minutes to allow it to warm up a bit before rolling out again. Keep your surface well-floured! And if you have a marble slab for rolling pastry or pastry cloth, definitely use it! It will make lifting your designs much easier!
How To Begin Your Pie Decorating
All of the pies below require two pie crusts. For each design, begin by rolling out the bottom crust and lining a 9-inch (23cm) pie pan with it. Trim the edges of the crust so that there is a ½ inch (1½ cm) overhang past the edge of the pie pan. Then fill the pie with your desired filling and brush the edges with an egg wash. Now choose your top crust design and proceed as directed!
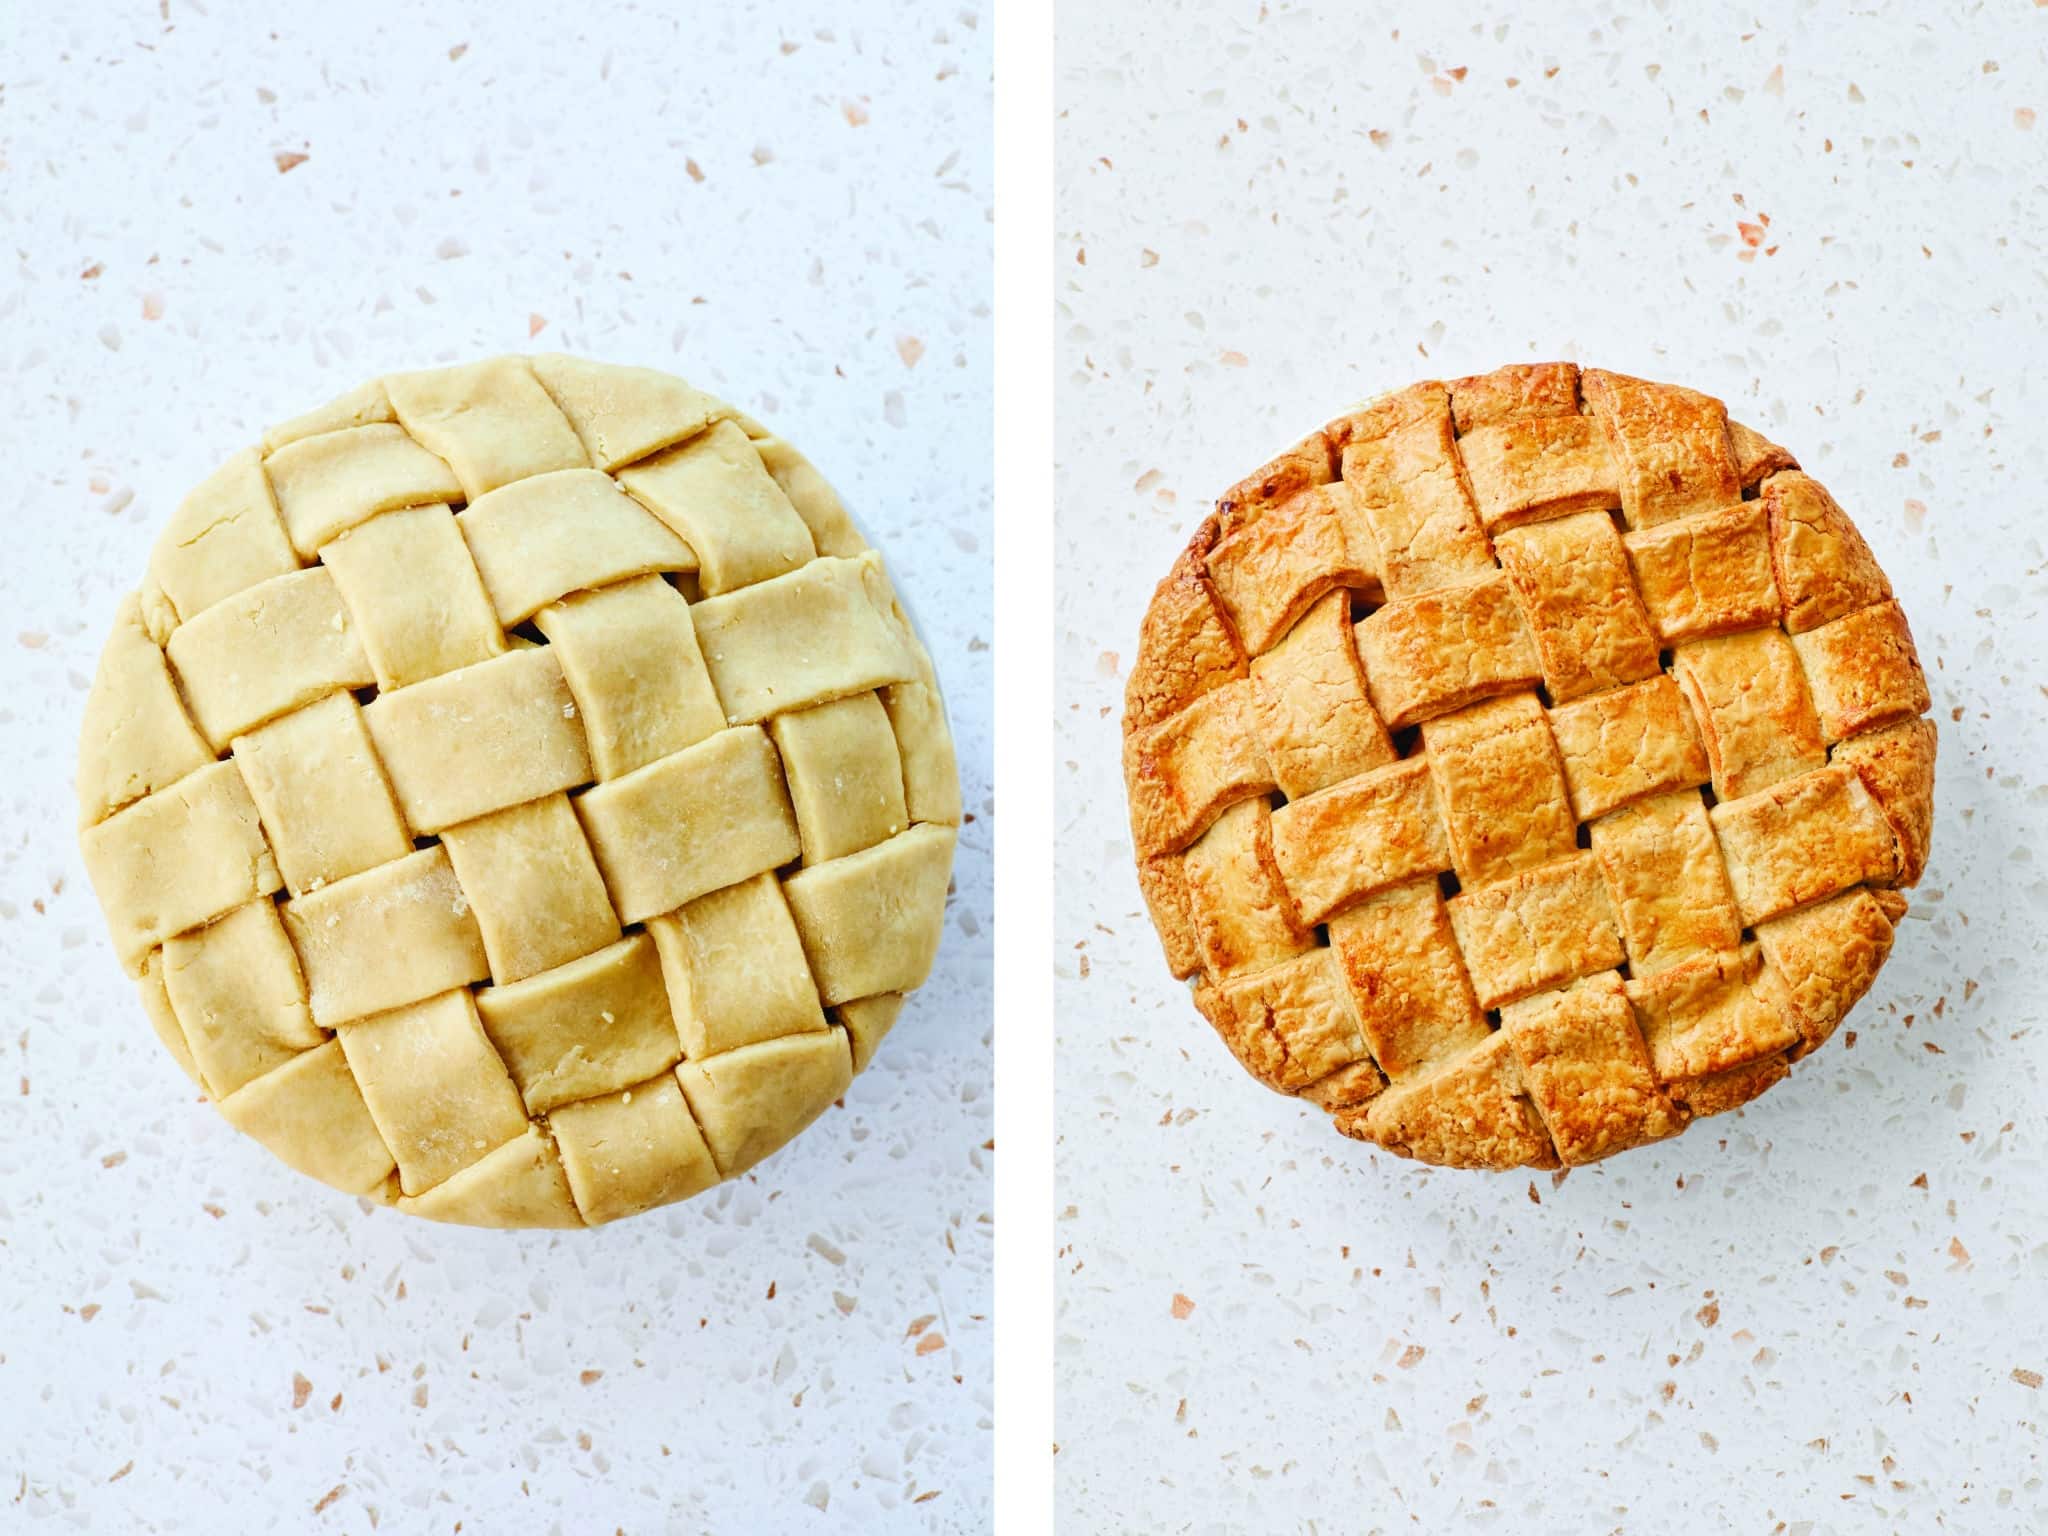
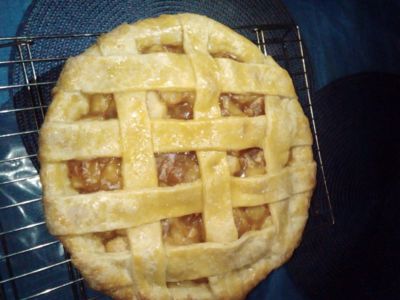
Thick Lattice Pie Design
This is as classic as pie decorating gets! If you’ve ever seen a cartoon where a pie was cooling on a window sill, this is the pie you remember. Here’s how to do it!
Cutout Top Pie Design
After cutting out the holes on the top pie crust (this also works well for venting!), place them around the edge for a gorgeous look.
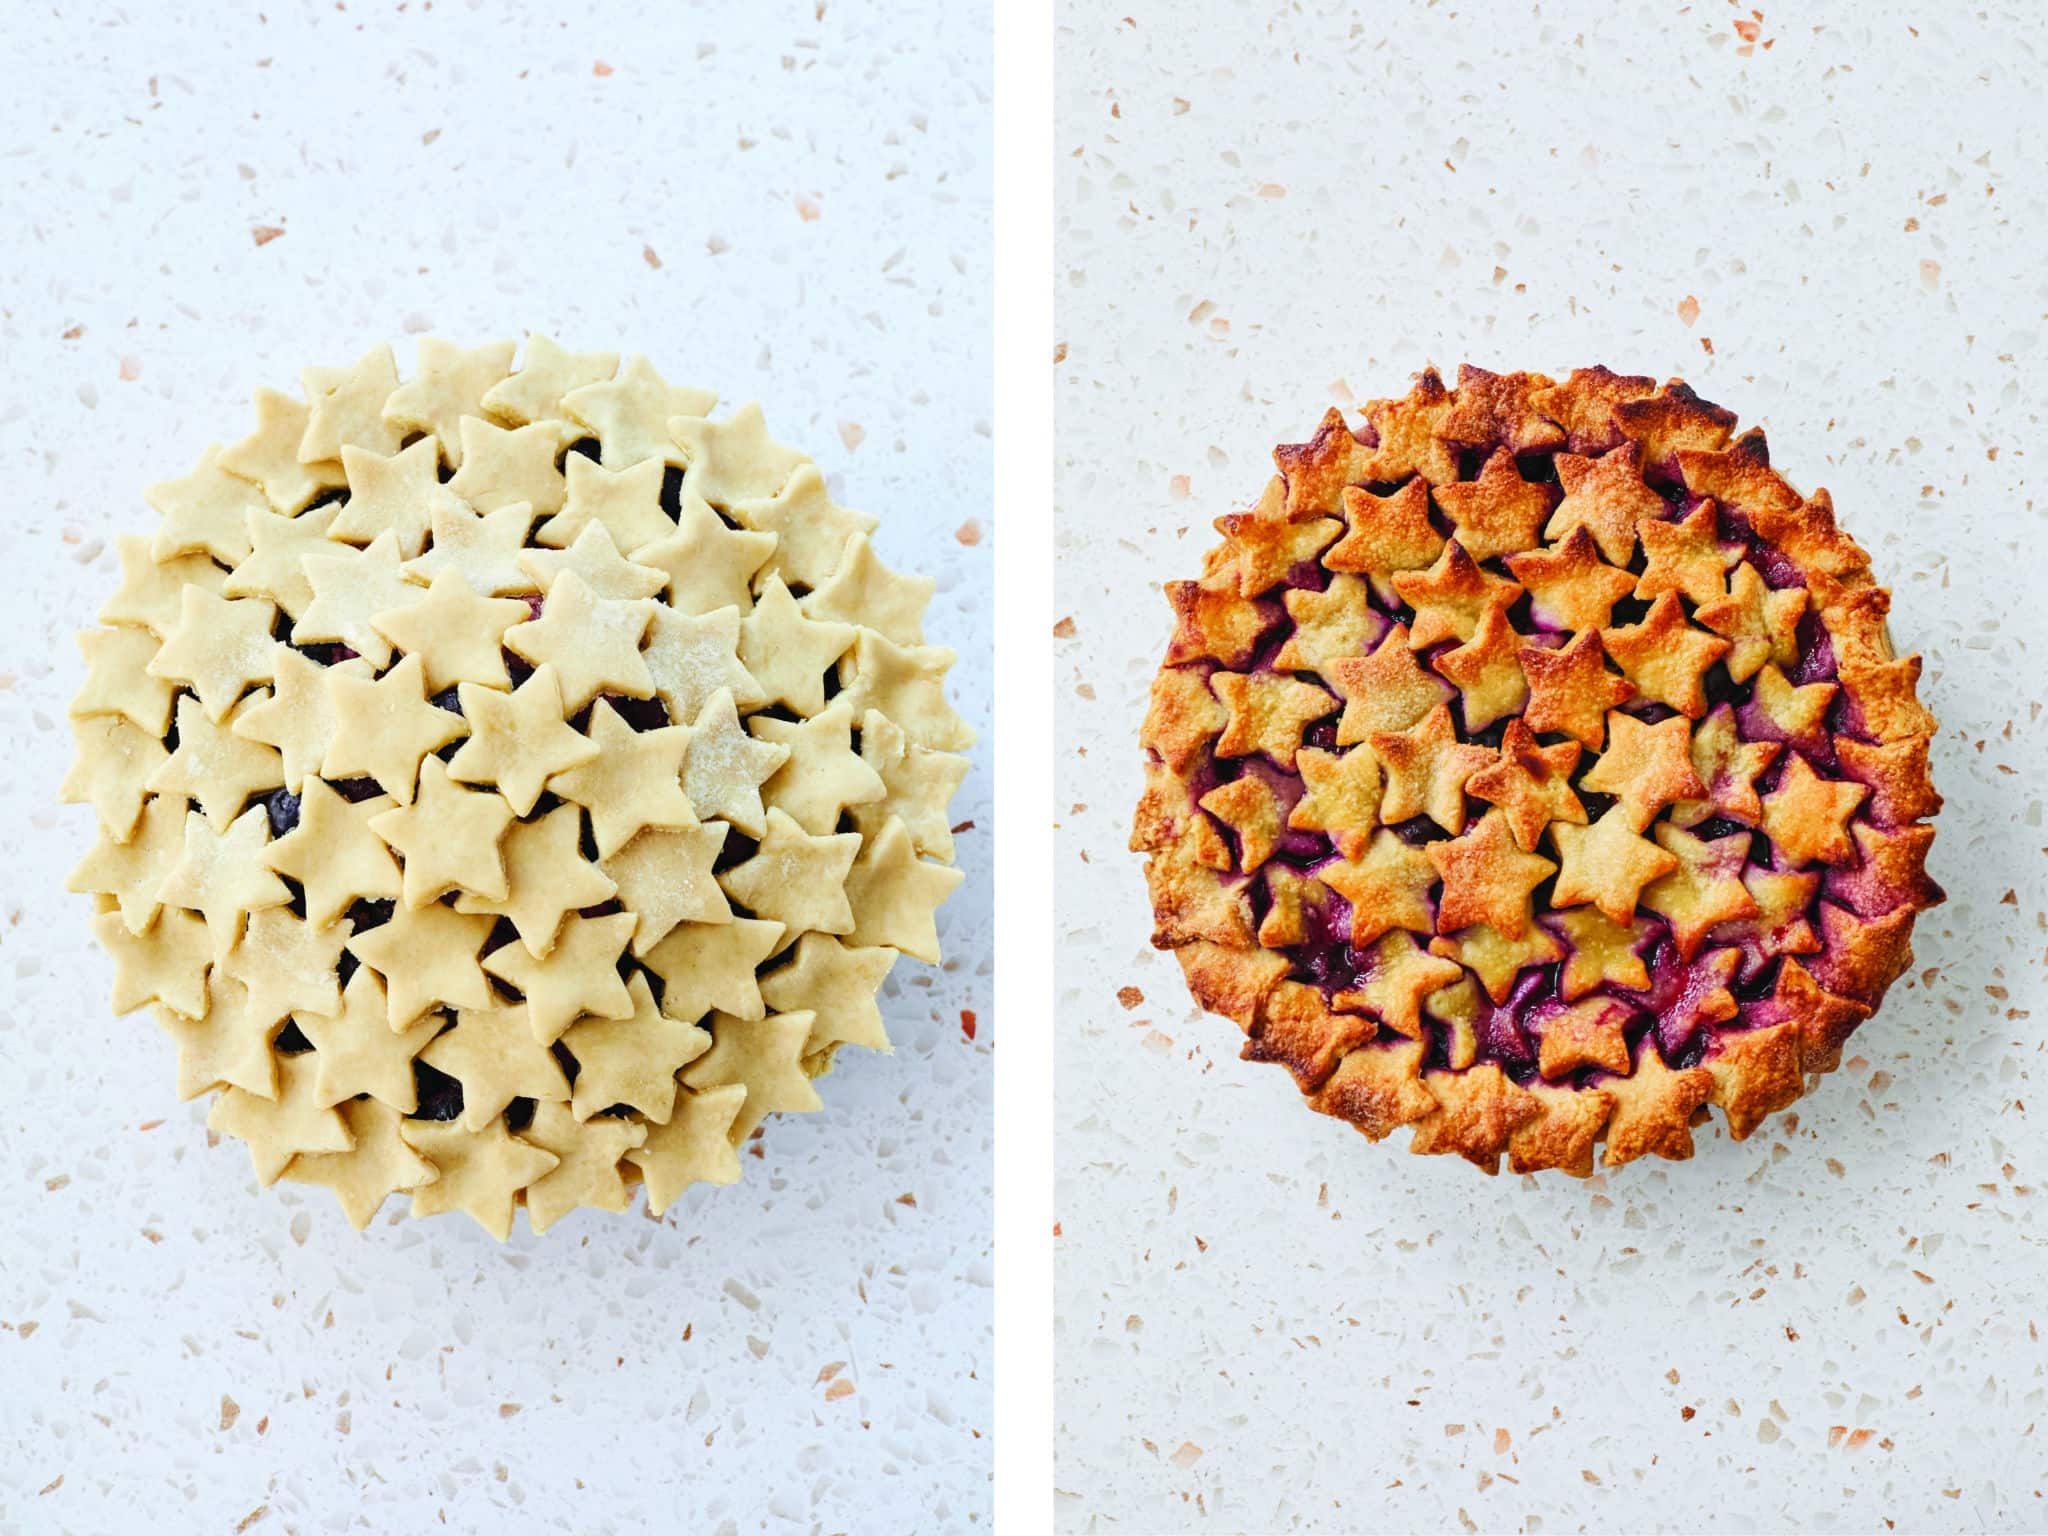
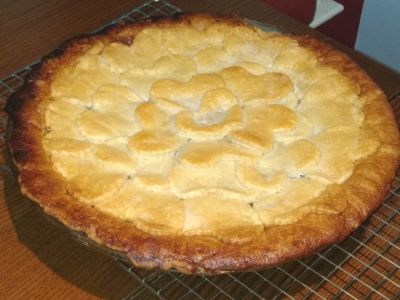
Star Cut Out Pie Design
Somewhat like the previous design, this pie crust decoration uses cutouts — but completely, instead of using negative space!
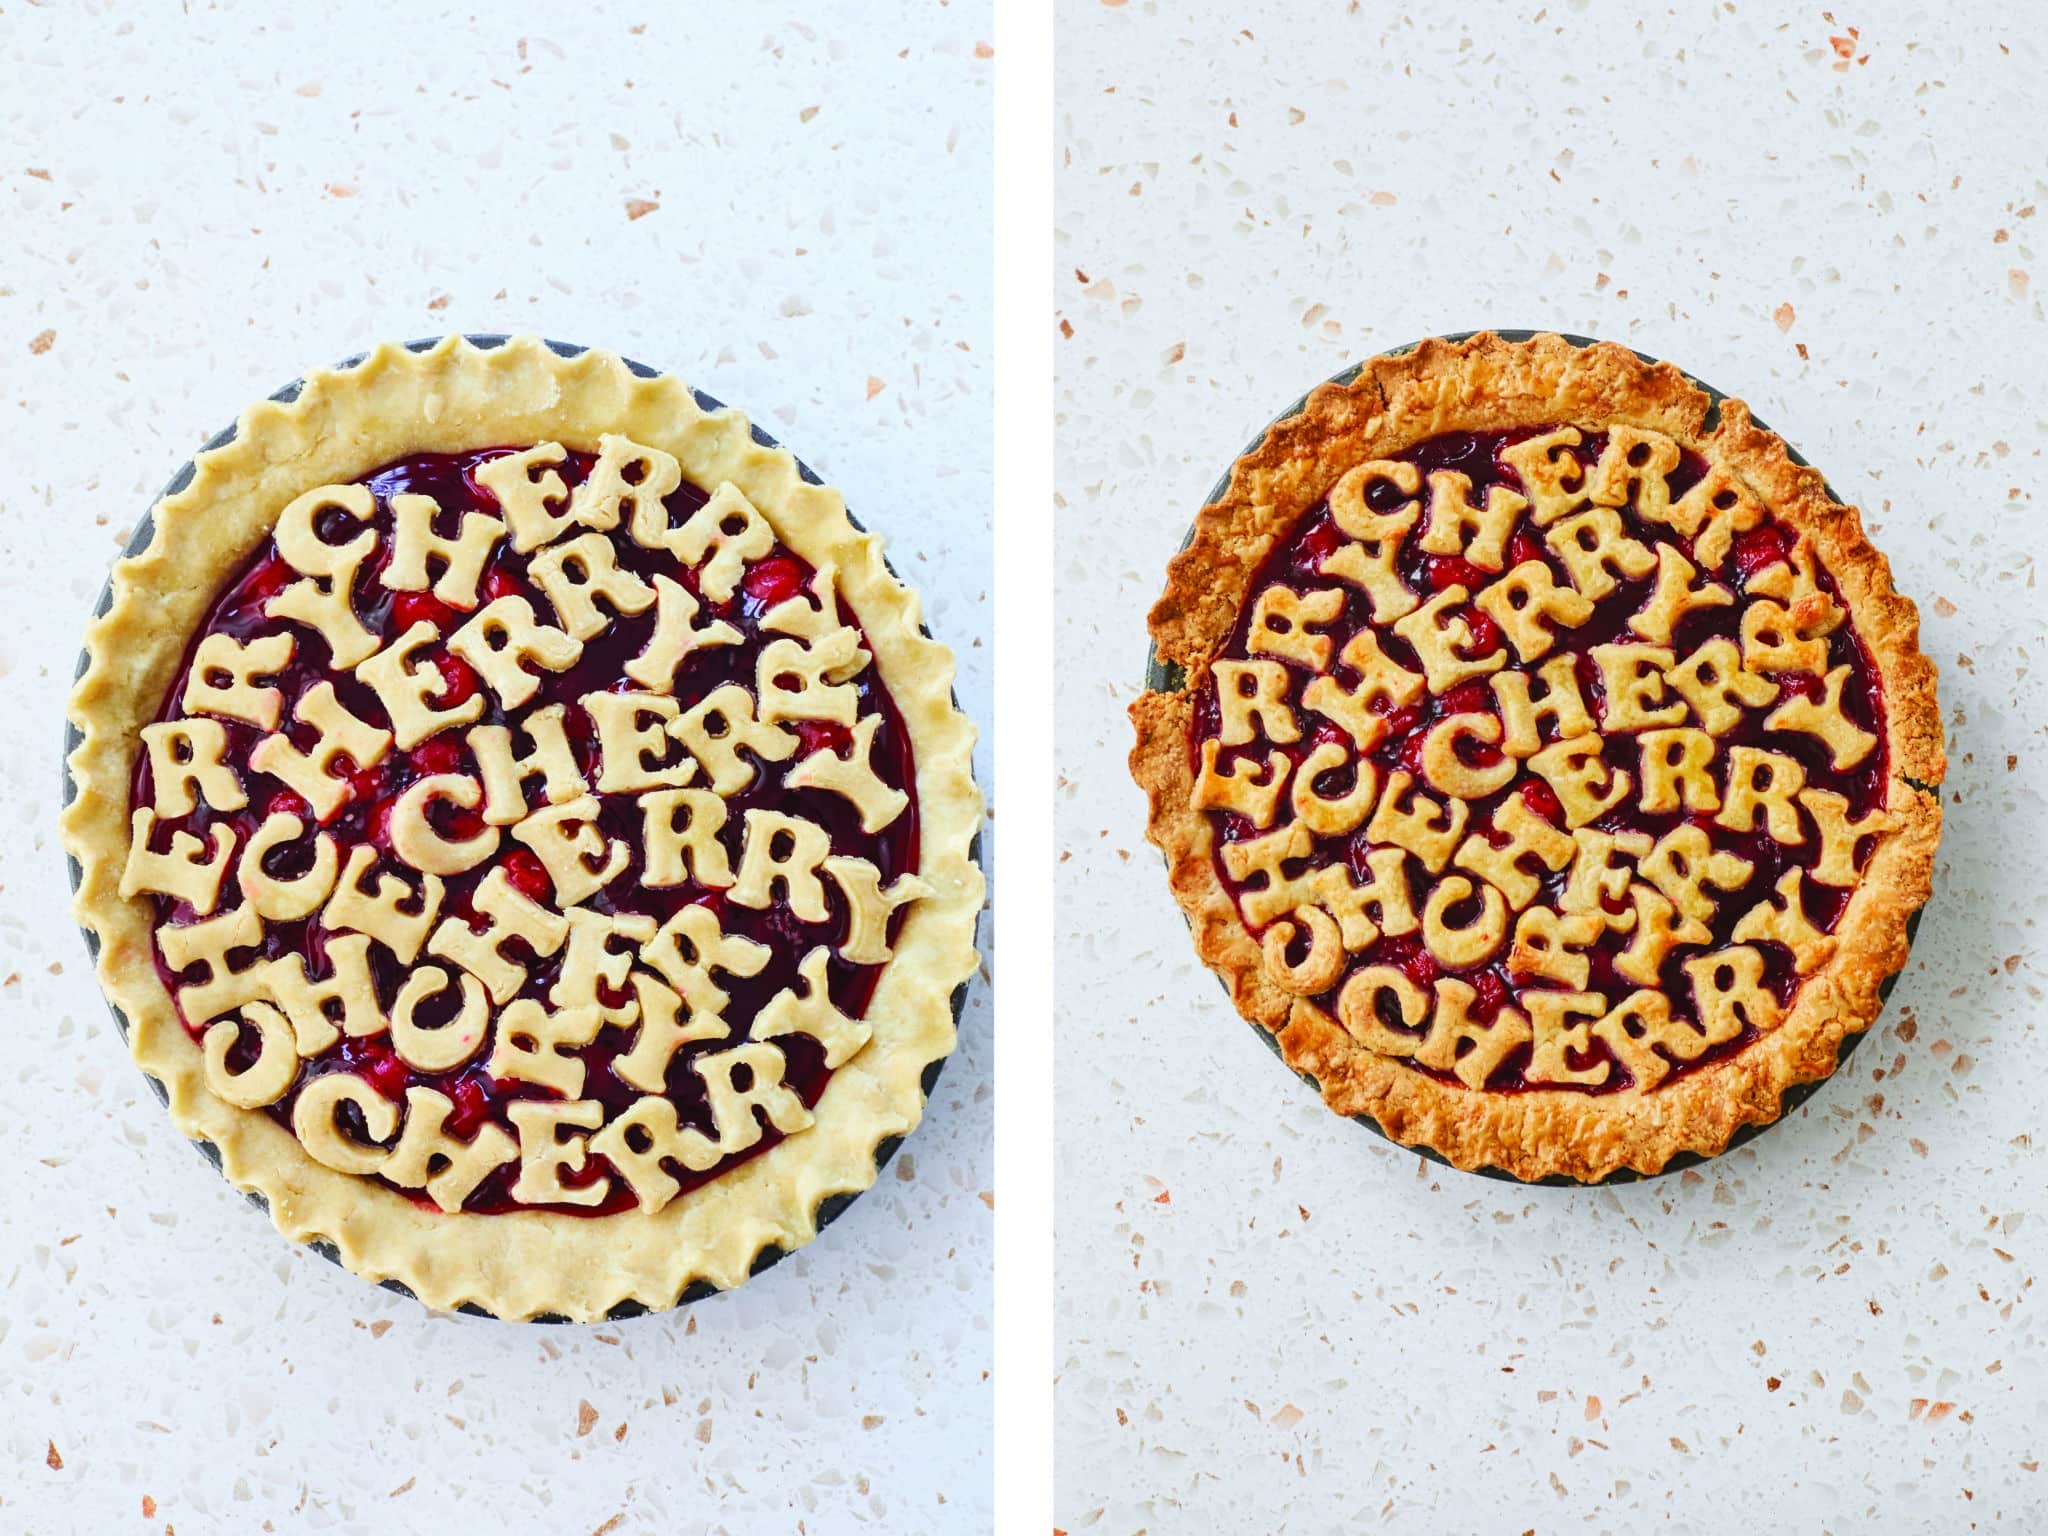
Cutout (Letters or Shapes) Pie Design
One of the most fun of all these designs is cutting out letters and arranging them in multiple and loose versions of the type of pie!
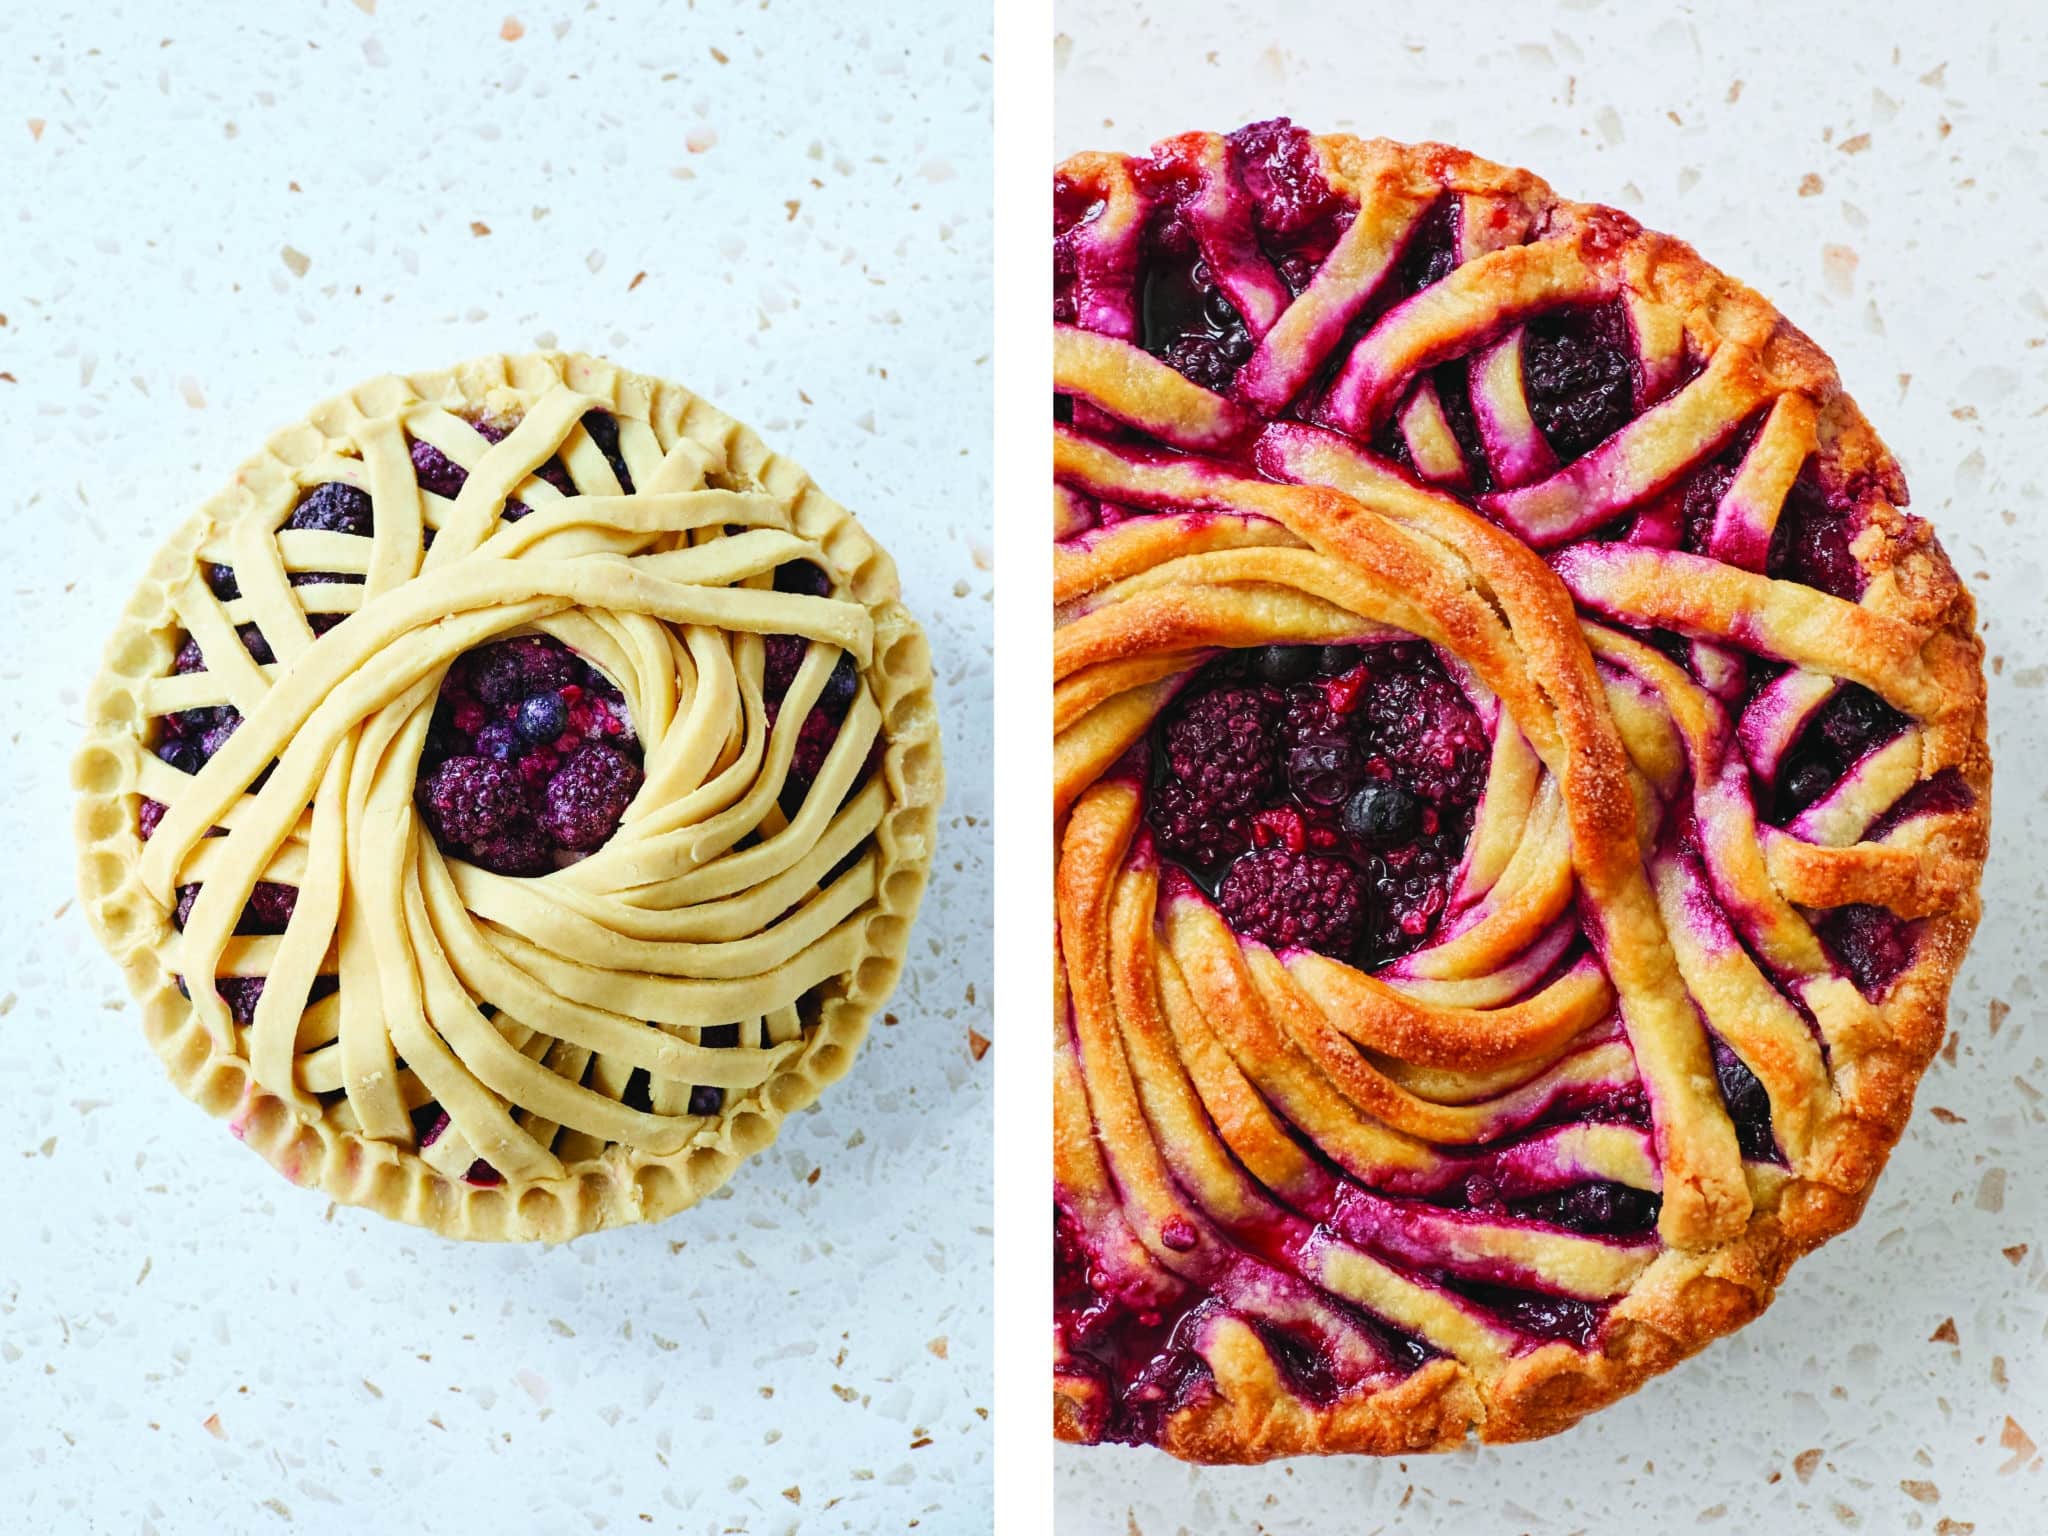
Geometric Strips Pie Design
Using geometry can make things beautiful? Yes! Math, shapes, and geometry — all of them can lend itself to gorgeous pie designs. Brush all over with the egg wash, sprinkle with sugar if desired, and bake according to the directions in the recipe.
Make More Pies!
Perfect Classic Apple Pie Best-Ever Pecan Pie How to Make Pumpkin Pie Blueberry Pie Strawberry Pie Mile High Chocolate Pie
And don’t forget to buy my Bigger Bolder Baking Cookbook! Δ Δ
Meet Gemma
Meet Gemma
Hi Bold Bakers! I’m Gemma Stafford, a professional chef originally from Ireland, a cookbook author, and the creator of Bigger Bolder Baking. I want to help you bake with confidence anytime, anywhere with my trusted and tested recipes and baking tips. You may have seen one of my 500+ videos on YouTube & TikTok or as a guest judge on Nailed It! on Netflix or the Best Baker in America on Food Network. No matter your skills, my Bold Baking Team & I want to be your #1 go-to baking authority.